Adding Shortcuts To An App: Part One
When I decided I wanted to make a Shortcuts utility app, I downloaded Apple’s Shortcuts demo project ‘Soup Chef’ to try and figure it all out.
It's a really excellent demo project, full of all the functionality that can be used to make complex shortcut actions, but since I was just starting out, I found it overwhelming how much was in there.
There weren’t a great deal of articles to help learn the basics from scratch - especially in a SwiftUI project - so I thought I would write my own to help anyone else looking to do the same.
My intention with this series of posts is to take you from a new project right through to adding complex shortcuts, step by step. I'd suggest reading this tutorial and then moving on to the Soup Chef project to learn more about using frameworks, storing data between your intent extension and your main app and how to localise your shortcut actions.
The completed project we’re building is available in full on GitHub and I’ll be updating it as I release each post.
Step One
In this first tutorial, we’ll be creating a basic project and adding our first shortcut which, when run, will simply make any input text uppercase.
Let's create a new project in Xcode. Select ‘single view app’, give it a name and set the user interface to SwiftUI.

Step Two
Shortcuts are a part of SiriKit and it's an ‘intent extension’ which handles most interactions with SiriKit. It's like a separate shard of your app that runs in the background.
Go to File > New Target, add an Intents Extension. Give it a name, I’m calling it Shortcuts.

Step Three
Right click on our new ‘Shortcuts’ target folder, and add a new file. Select the SiriKit Intent Definition File. Leave it called ‘Intents’

Step Four
Click on the new definition file and click the ‘+’, to add a new Intent, which will eventually be a single action in Shortcuts.
Here we can define what the shortcut action will look like and what parameters it accepts. We’ll call this ‘MakeUppercase’. As per Apple’s guidelines:
Name your intent using a VerbNoun convention, like SetAlarm, CheckOrderStatus, and so on
Make sure it’s added to the Shortcuts and main app targets in the inspector:

Step Five
Add a short description about what the shortcut does. Then let's add a parameter, this will be the source string we want to make uppercase. We’ll call it ‘text’. This will only support a single value so we’ll leave ‘Supports multiple values’ unticked. We don’t want a default value, so we’ll leave that blank.
Step Six
We’re required to add a Siri prompt for the parameter. This is used if the shortcut is triggered without a UI for example through Siri or on a Homepod. Let's just enter: “Which text would you like to make uppercase?”
Step Seven
We’re going to show an error to the user in the Shortcuts app if the source text is empty. This is optional. Our validation error code will be ‘noText’ and our template is “Please enter some text to make uppercase”.

Step Eight
Now in the ‘Suggestions’ section we’ll untick ‘Intent is eligible for Siri Suggestions’. This allows the system to show the action on the lock screen or in the search from the dashboard but we don’t need that for this example.
Step Nine
Now we’ll configure how our shortcut action will look inside of Shortcuts. Let’s select our text parameter for both ‘Input Parameter’ and ‘Key Parameter’. Before writing how the action is displayed, it’s worth checking Apple’s User Interface Guidelines for phrasing guidance:
Start titles with a verb and use sentence-style capitalization without punctuation. Think of a shortcut title as a brief instruction
We’ll use “Make text uppercase”. Start typing the name of your parameter to select the variable.
Any variables not entered in the Summary box will show inside the Shortcuts action’s ‘Show More’ twirl-down. These are usually optional parameters.

Step Ten
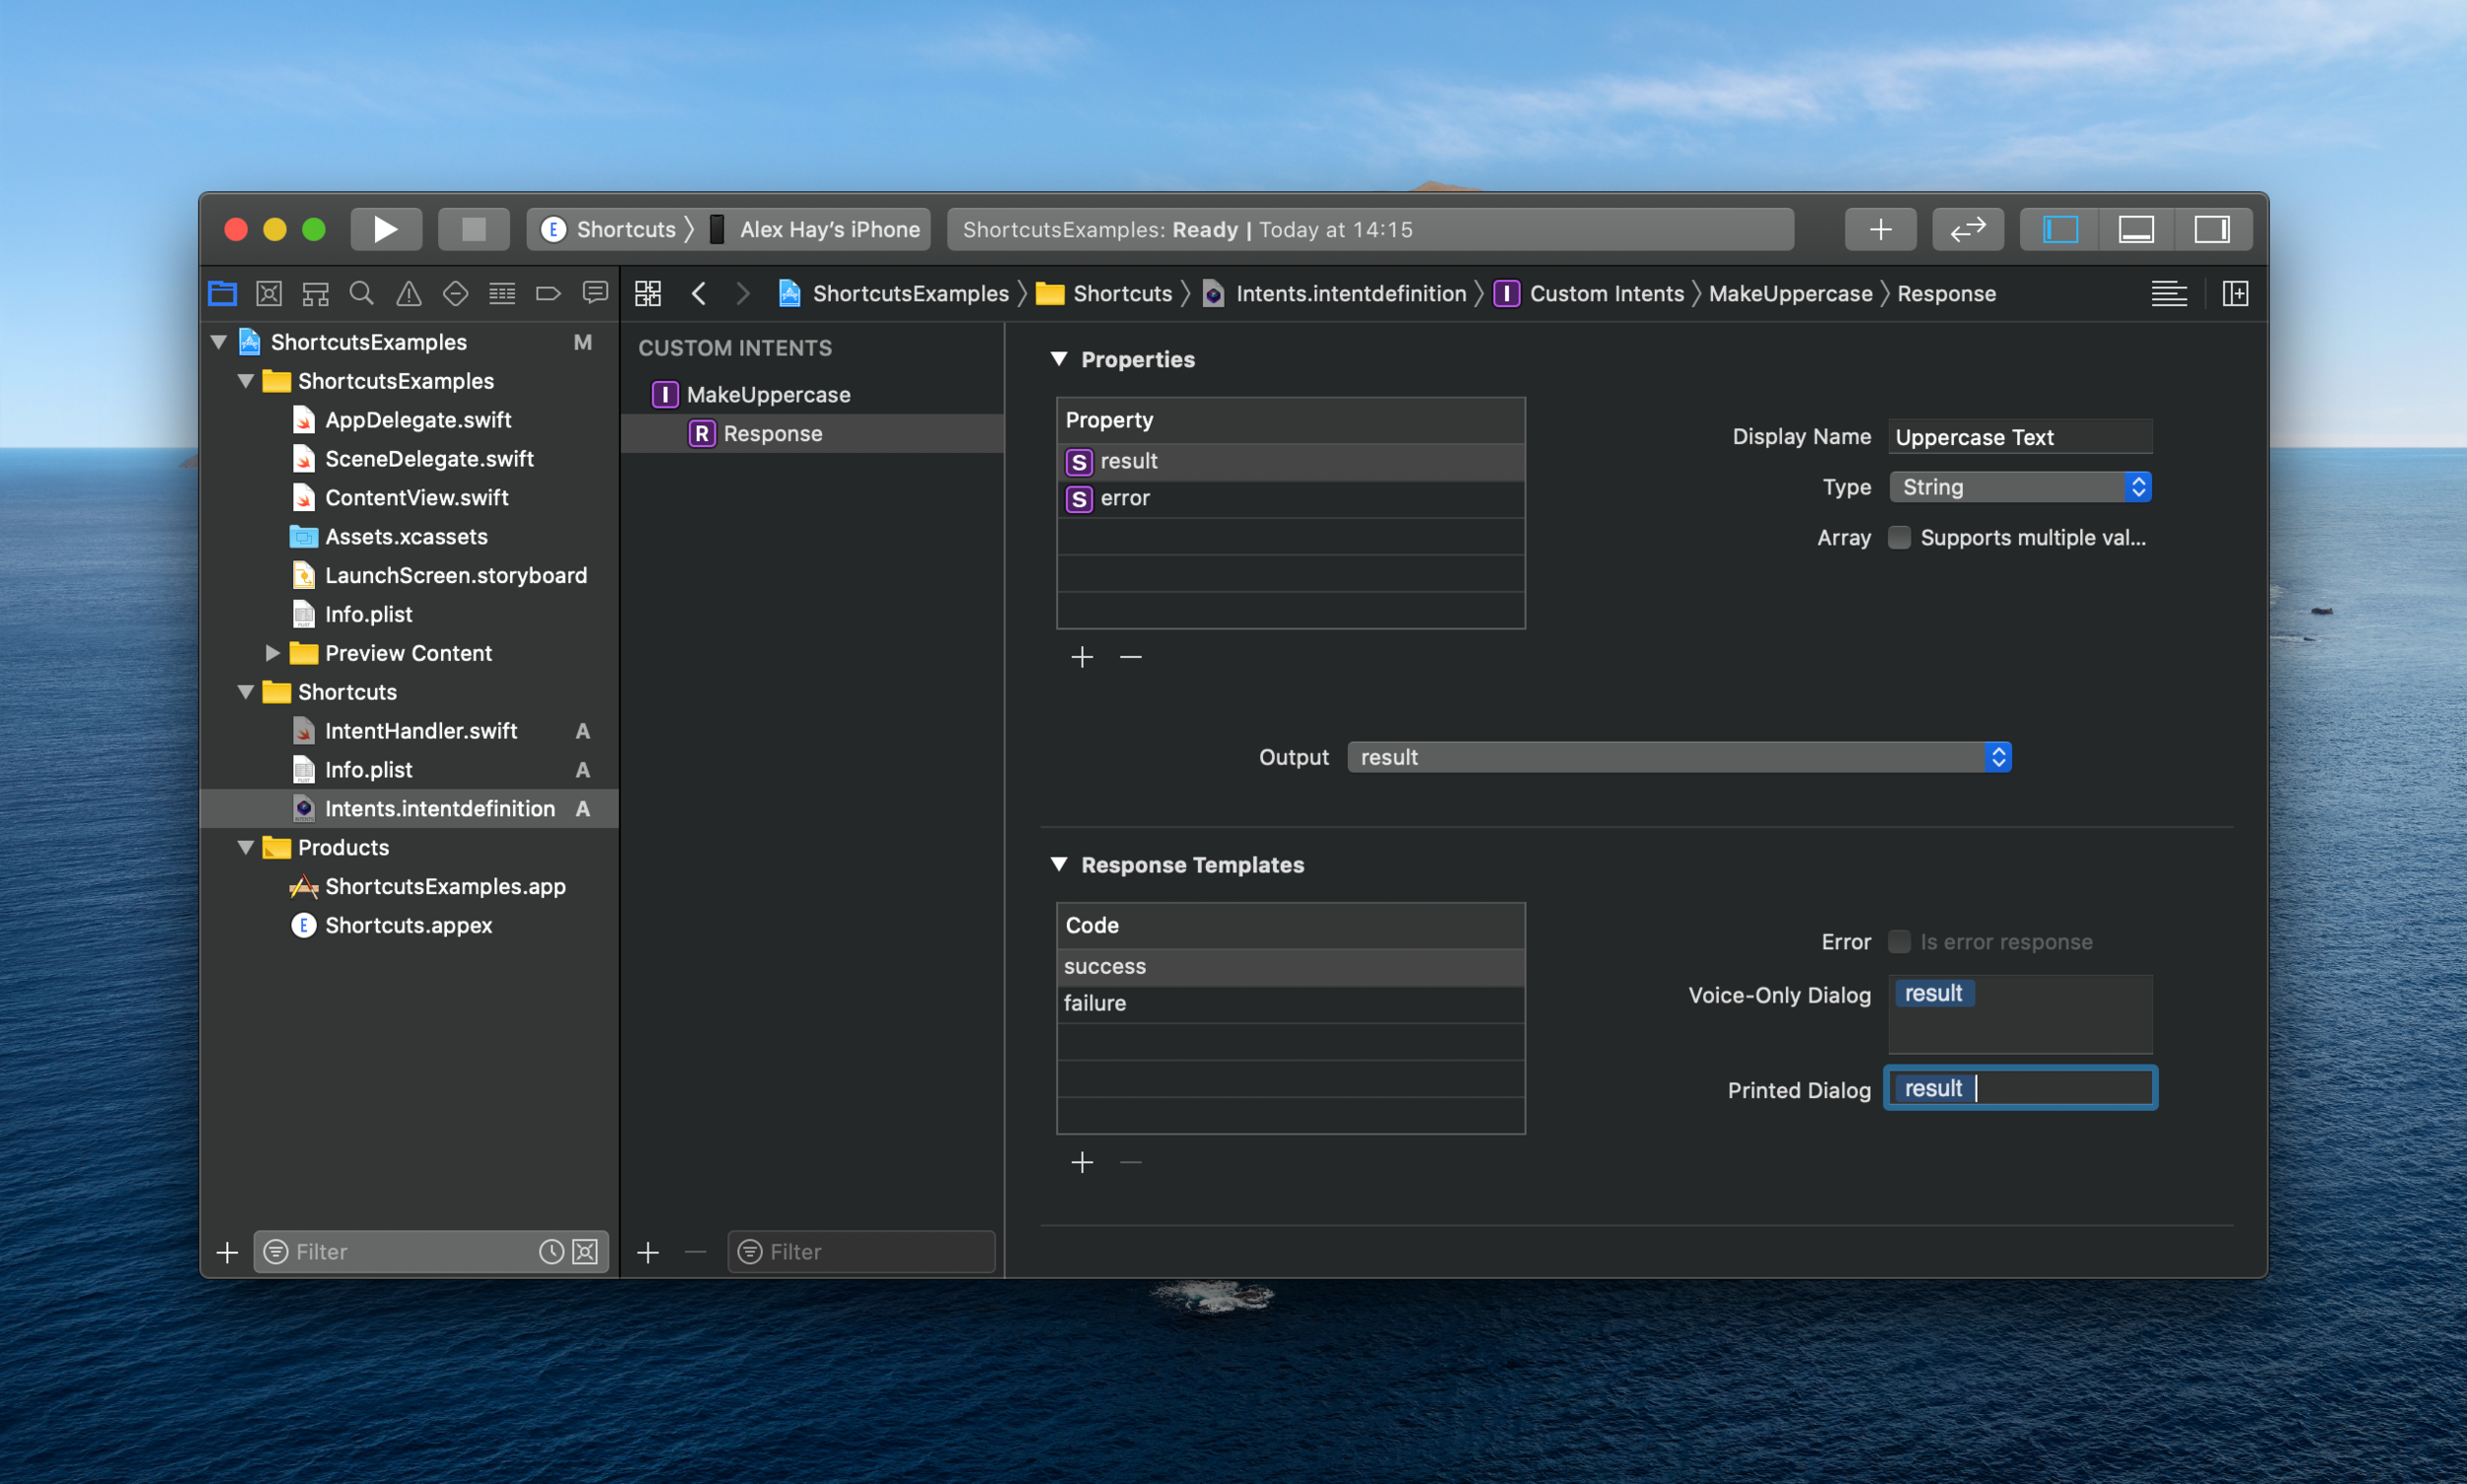
Now let’s configure what is output from the Shortcuts action. Click on the custom intent’s Response. We’ll add two properties, “result” and “error”. Both are strings and won’t support multiple values. We’ll change the display name of the ‘result’ to “Uppercase Text”.
Step Eleven
We’ll change the output to our new “result” property - this is what will be output from the shortcut action. In our Response Templates, we’ll add the ‘result’ property to both the voice and printed success dialogs and we’ll add the ‘error’ property in the same way to the failure code
Step Twelve
Now let’s write some code! Let’s head to our Shortcuts target folder and create a new Swift file called “makeUppercaseHandler”. We’ll a define a new subclass which inherits from NSObject and conforms to the MakeUppercaseIntentHandling protocol (which is automatically generated when we added our “makeUppercase“ intent):
import Intents

class MakeUppercaseIntentHandler: NSObject, MakeUppercaseIntentHandling {

}
You’ll see it throws an error because we’re not handling the ‘text’ parameter we added or handing the intent. Let’s hit the fix button to add the required protocol stubs.

Step Thirteen
You’ll see we have two functions we need to add code for: resolving the text parameter and then handling the intent. Let’s resolve our text parameter first.
func resolveText(for intent: MakeUppercaseIntent, with completion: @escaping (MakeUppercaseTextResolutionResult) -> Void) {
    if let text = intent.text, !text.isEmpty {
        completion(MakeUppercaseTextResolutionResult.success(with: text))
    } else {
        completion(MakeUppercaseTextResolutionResult.unsupported(forReason: .noText))
    }
}
Here we’re checking make sure the text parameter isn’t nil or an empty string. If it does have a value, we’re sending it through to the handler. If there’s no value then we’re going to throw the error code we defined earlier.
Step Fourteen
Now let’s handle the intent:
func handle(intent: MakeUppercaseIntent, completion: @escaping (MakeUppercaseIntentResponse) -> Void) {
    if let inputText = intent.text {
        let uppercaseText = inputText.uppercased()
        completion(MakeUppercaseIntentResponse.success(result: uppercaseText))
    } else {
        completion(MakeUppercaseIntentResponse.failure(error: “The entered text was invalid”))
    }
}
We’re defining our text variable - we know the optional value is safe because we’ve validated it in the previous step but for the sake of showing how to throw an error that will display in Shortcuts, we’re passing a Intent Response failure with the template we set earlier.
If the text is valid we’re making it uppercase and then using the response code to output the result. These are the other response codes included automatically (which we’ll look at in later posts):
unspecified, ready, continueInApp, inProgress, success, failure, and failureRequiringAppLaunch

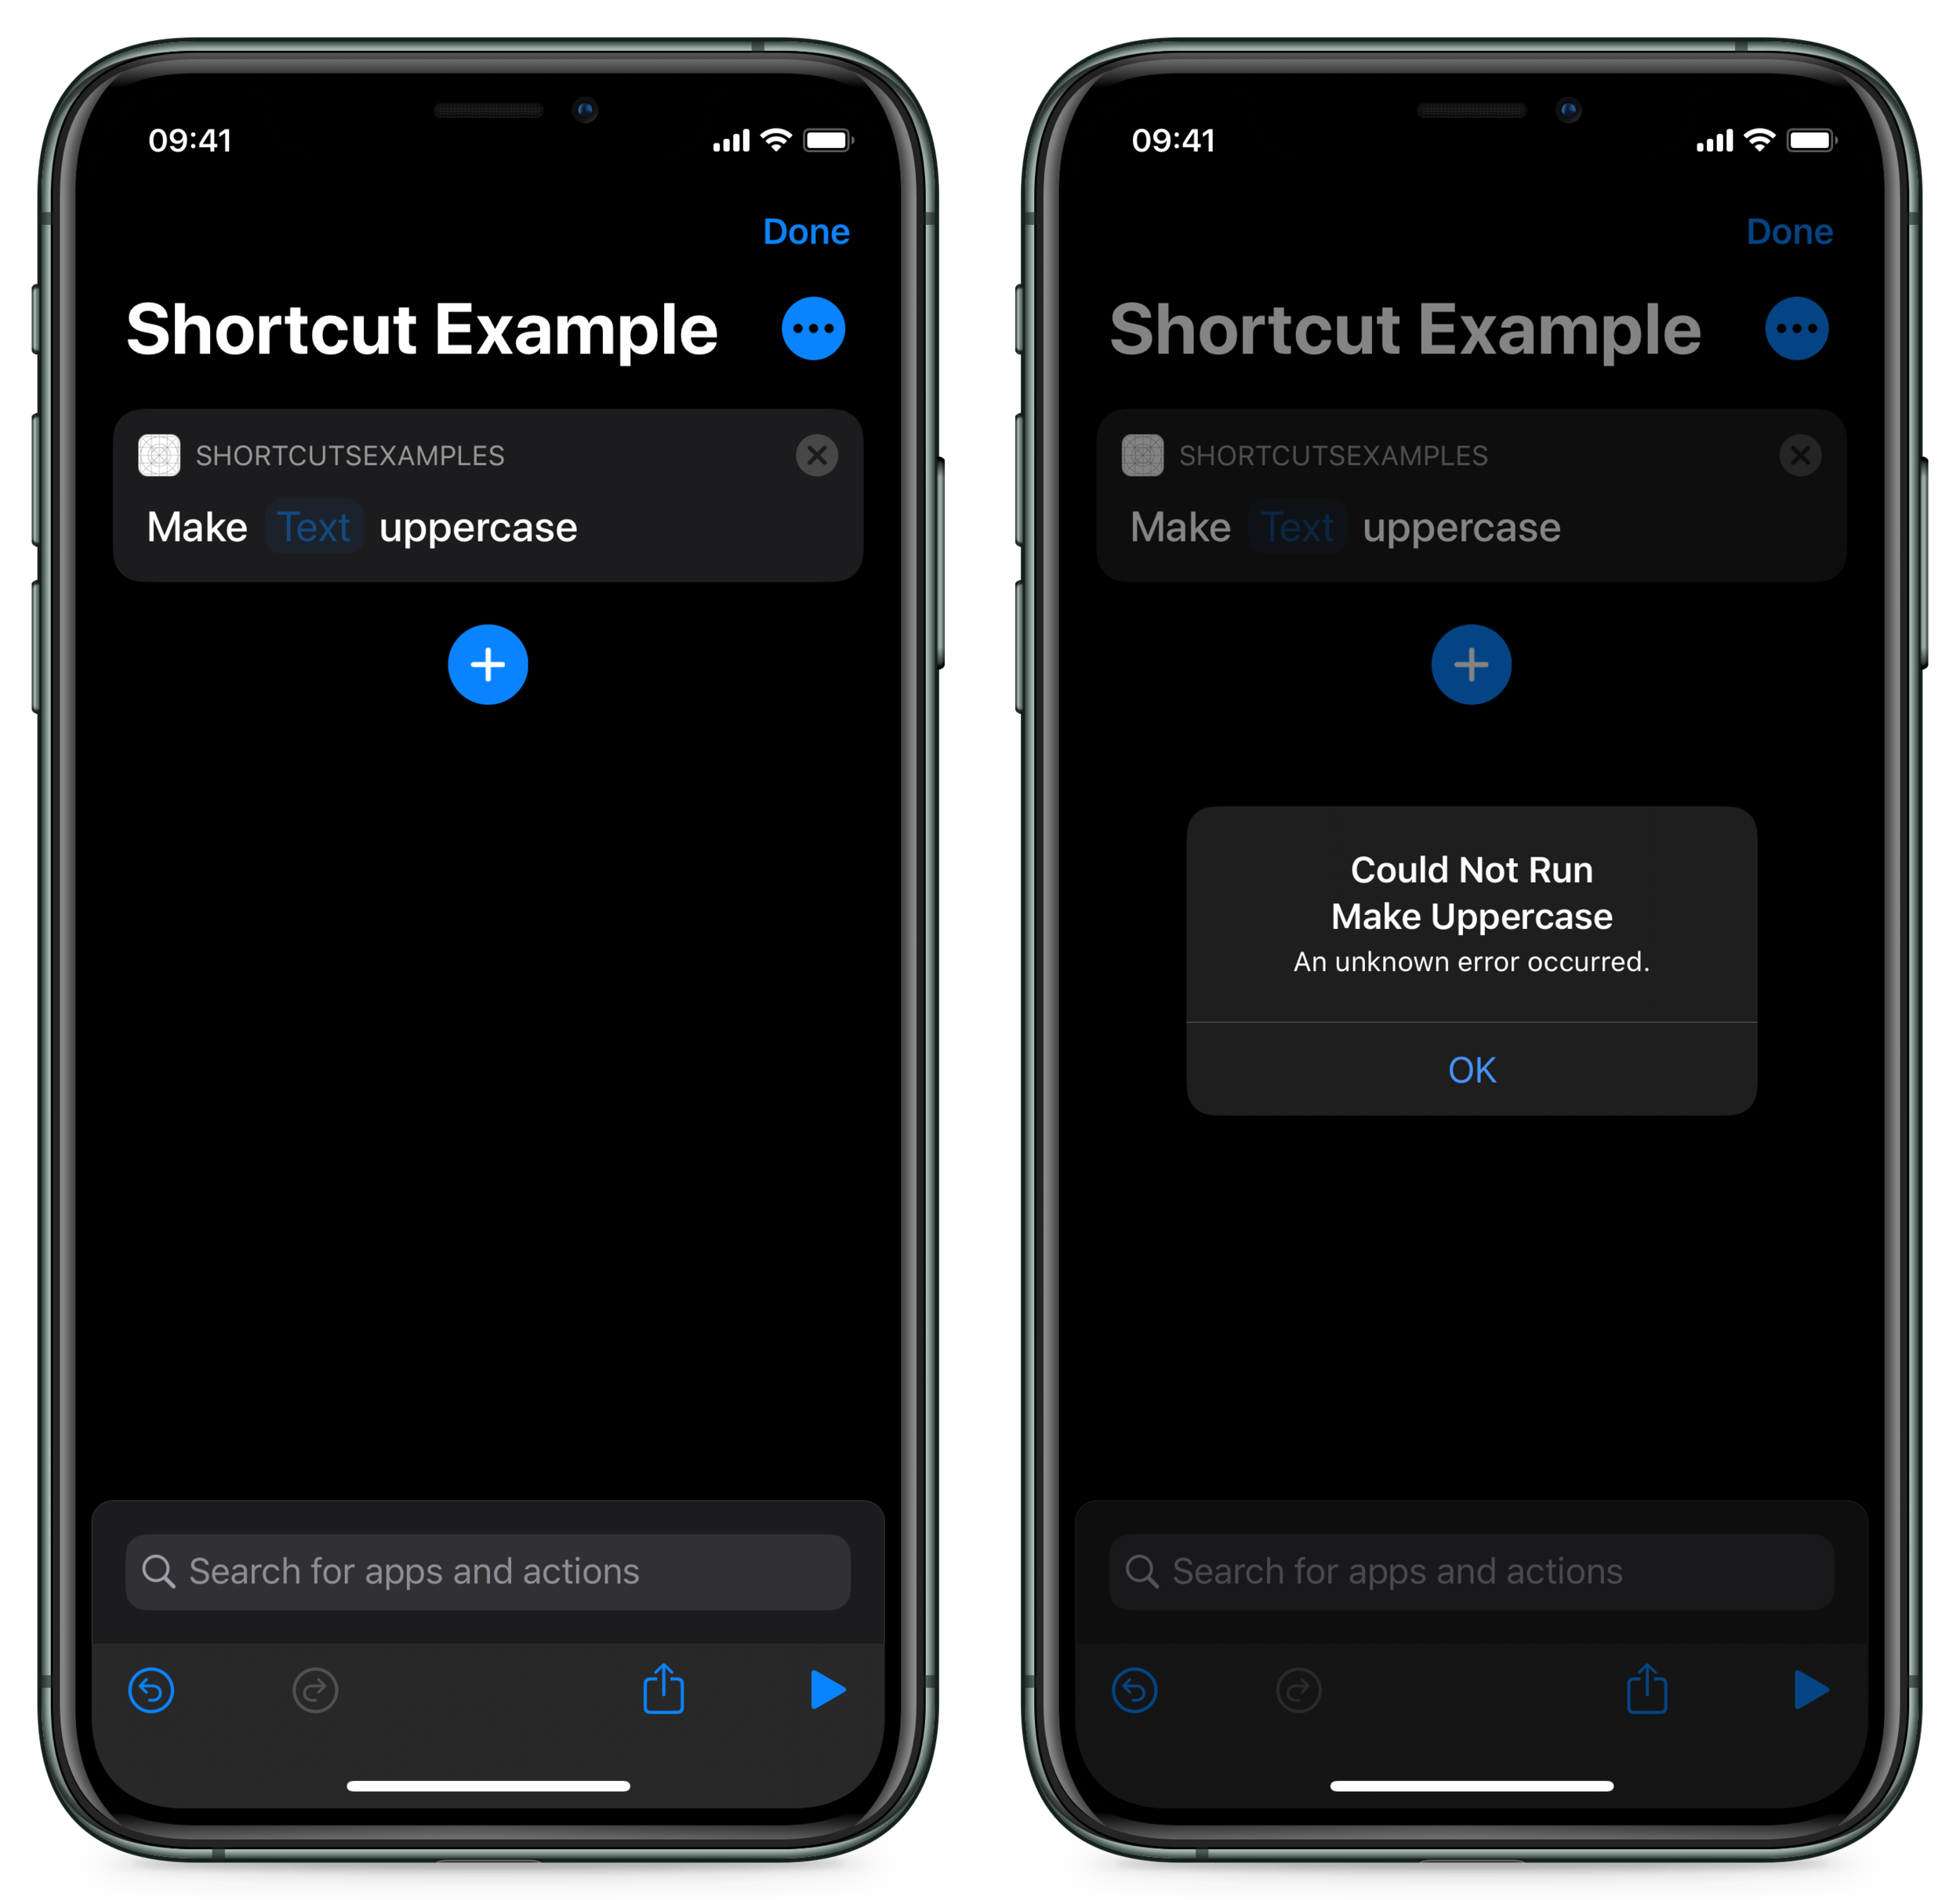
Step Fifteen
OK so far so good. Our project builds and if we run it on our device, in the Shortcuts app we can see a new action called ‘Make Uppercase’. When we run it however, we’ll get “An unknown error occurred”. That’s because the intent handler we just wrote isn’t being called when the shortcut is run.
Step Sixteen
Let’s go to the IntentHandler file in our shortcuts target. We’ll delete the existing return ‘self value’ and add a switch statement that will return the intent handler we just wrote if the intent is MakeUppercase.
import Intents

class IntentHandler: INExtension {

    override func handler(for intent: INIntent) -> Any {
        switch intent {
        case is MakeUppercaseIntent:
            return MakeUppercaseIntentHandler()
        default:
            fatalError(“No handler for this intent”)
        }
    }
}
Now if we add more shortcuts actions we can write intent handlers for each one and call them from this switch statement. The intent should never be unhandled so we’ll throw a fatal error by default.
Step Seventeen
Let’s build our app and go back to the Shortcuts app and try again.
Success! Our text is made uppercase and when there’s no value we see the error message.

Summary
We’ve successfully created a shortcut action that works as expected in the Shortcuts app.
We’ve learnt how to validate a single parameter and how to output results and errors.
Now that we have a foundation in place, in the next posts we’ll look at more complex shortcuts - handling arrays, files and pre-populated parameter lists, custom output objects and returning data to our main SwiftUI app.
These are the other posts in the series:
Part 1: Creating a project and adding the first action
Part 2: Exploring parameters: arrays, enums, calculated lists and files
Part 3: In-app intent handling, custom output types, visual list API and using the SwiftUI app protocol
Part 4: Visual Lists in parameters and pushing data from Shortcuts into a SwiftUI view
The complete code for the tutorials is also on GitHub:
Parts 1 & 2 (iOS 13)
Parts 3 & 4 (iOS 14)