New Release: 2023.1

We’re very excited for our first update to Toolbox Pro to be released.

2023.1 brings the following fixes:

  • Fix Apple Music actions failing due to an expired token

  • Fix “Scan Document” sometimes returning to the shortcut before adding the image to the clipboard

  • Fix “Get Location from what3words” failing with a ‘quota exceeded’ error

  • Fix links to example shortcuts for Image Viewer and RSS Reader

  • Fix Global Variables with values less than 30 characters not appearing in the app (but still appearing in Shortcuts)

Due to the transfer from Alex Hay's developer account to ours, Global Variables as well as File and Folder bookmarks have been unfortunately reset. We apologies for the inevitable inconvenience caused.

If you have a Mac, you can recover your Global Variables by following the guide here.

Dom Chester
Upcoming Release: 2023.1

As we're preparing to release our first update to Toolbox Pro (2023.1) since taking over the app, we wanted to warn our users of a few breaking changes. Due to the nature of how the app stored data (the app group and keychain data are related to the Apple Developer Account, so we don't have access to that data after the transfer to our account), all Global Variables and File and Folder Bookmarks will be reset after we release the update.

If you're using these features, please backup your data before updating to 2023.1 when it's released later this week.

The release will:

  • Fix broken Apple Music integration

  • Fixes the RSS Reader and Image Viewer example shortcuts

  • Fixes document scanning returning to the shortcuts app before the scan has been placed on the clipboard

  • Other minor bug fixes and improvements

We're incredibly sorry for the inconvenience this causes.

Please let us know if you have any further questions!

Dom Chester
Snailed It Development Take Over Toolbox Pro

After the tragic death of Alex Hay back in March, Snailed It Development Ltd are excited and honoured to announce we’ve been entrusted by Alex’s family to take over the development of his apps, including Toolbox Pro, Nautomate and Logger for Shortcuts.

Alex was a well loved member of the indie development community, featuring on numerous podcasts and articles. He was always known as being a kind and generous man, being willing to share his time and knowledge with anyone who asked.

We are still in the process of gaining access to all of Alex's accounts, as well as still familiarising ourselves with the code base, so we appreciate your time and patience as we start getting updates released.

For more information, please see the full announcement post here.

 
Alex Hay

In loving memory of Alex Hay

 
Dom Chester
2020.7 Beta Release

The latest beta of Toolbox Pro is now available to download.

This will be a significant update with a lot more power under the hood because of some new technologies in Shortcuts on iOS14.

It is, however, also a work-in-progress with some caveats you should be aware of.

IMG_9194.PNG

New Tools

New tools in this version include Pick A Colour, Is Silent Mode On, Pluralise Words, Is Premium Unlocked, Find/Download Unsplash Photos, Find Pexels Videos, Get what3words Address & Build URLs (from components).

I'm still adding new examples to demonstrate how to use them.

More Power

Many powerful actions in Toolbox Pro previously required opening the Toolbox Pro app before returning to Shortcuts due to memory limitations.

In this version, many of these actions no longer have this shortcoming, with the entire action being performed directly inside of Shortcuts.

Some of the actions adapted to take advantage include Create Icon, Create Matte, Detect Faces (with new landmark features), Detect Motion, Detect QR Code, Blur Images, Filter Images, Get Text From Images (now supports more languages) and Scale Image.

Saving, getting and listing the contents of bookmarked folders (outside of the Shortcuts sandbox folder) can now be done right inside Shortcuts too and these tools are all now free!

Tools that manipulate lists like sorting, shuffling or removing duplicates can now handle many more items at once.

Get Text From Audio can now also transcribe many more languages and can optionally perform more detailed recognition online (with a 1-minute limit).

The Caveat

One big issue I’m butting my head against at the moment it that tools which output arrays of custom objects (like the new Quick Menu tool or Find Movies) play really badly when you add a ‘Choose From List’ or ‘Quick Look’ action after them.

It may seem like your device is unresponsive as it takes 7 seconds (!) for each menu item in the list to appear.

One workaround is to change the output type to one of the object’s parameters instead, which works as expected but you lose the nice ability to see images along with text and subtitles in the list.

I’m hoping to have a fix for this soon.

UPDATE 16/12/20: This bug appears to be fixed in Shortcuts on iOS 14.4 developer beta 1. Once 14.4 is public, I will be aiming to release this new version of Toolbox Pro.

Compatibility

I’ve tried to maintain compatibility as much as possible so as not to break your older shortcuts.

For example, if you already have a shortcut that uses the iOS13 Get Text From Image tool, your shortcut should continue to work by bouncing to Toolbox Pro to perform the action but you’ll see a label on the action saying it’s been deprecated.

 
IMG_9186.PNG
 

When you search for Get Text From Images in the Shortcuts action library, you’ll now see the new action, which won’t require Toolbox Pro to be opened.

Feedback

As always, let me know if you have any problems or suggestions either through TestFlight (by taking a screenshot in the Toolbox Pro app) or send me an email.

Adding Shortcuts To An App: Part Four

In the last post we looked at:

  • In-App Intent Handling (accessing data directly from our app)
  • The new 'visual list' API
  • How to interact with Shortcuts using the new Swiftui app model in iOS14
  • Outputting custom types

In this post we’re going to continue the same iOS 14 project we started and we'll explore how we can use arrays of custom objects as rich lists in shortcut parameters and how to take data input in a shortcut action and display it in our SwiftUI app.

This project's code is available in full on GitHub.

Let’s get started!


Step One

In this tutorial, we'll add a new Shortcuts action to our app which will let the user choose one of the people saved in our app and open their detail page as a modal sheet.

You'll also be able to add a string in a 'note' parameter to demonstrate how you can pass data into your app from Shortcuts.

Firstly, let's add a new intent call ViewPerson to our IntentDefinition file.

We'll add two parameters. The first is person, which will let us pick from the array of people saved in our app (using the visual list API).

Make sure the type is set to Person (this is the ShortcutsPerson type we defined in our intent definition file last tutorial), and that "Options are provided dynamically" is also ticked.

 
CleanShot 2020-10-21 at 18.05.27@2x.png
 

Next, add a note parameter. This is a simple string that will be displayed on the person's detail page when the app opens.

 
CleanShot 2020-10-21 at 18.10.52@2x.png
 

Finally, add a sensible summary to display on the shortcuts action.

 
CleanShot 2020-10-21 at 18.12.34@2x.png
 

Step Two

Now we'll configure our SwiftUI views to react to a change of state.

When the user selects a person in the shortcut action, adds a note and then runs the shortcut, we'll open the app and display a modal containing the detail page of the person the user has selected, including the new note text.

In our PeopleViews.swift, we'll change our PersonDetailView to accept a Binding string for the note and change the layout so that we conditionally show the text if the note text isn't empty.

struct PersonDetailView: View {

    var person: Person
    @Binding var note: String

    var body: some View {
        List {
            HStack {
                Text("Job")
                    .foregroundColor(.secondary)
                Spacer()
                Text(person.job)
            }
            HStack {
                Text("Icon")
                    .foregroundColor(.secondary)
                Spacer()
                Image(systemName: person.iconName)
            }
            if note != "" {
                HStack {
                    Text("Note")
                        .foregroundColor(.secondary)
                    Spacer()
                    Text(note)
                }
            }
        }
        .navigationBarTitle(person.name)
    }
}

In our PeopleListView, we don't need to worry about about the note binding since this this won't be the entry point for showing the modal when triggered from our shortcut action. We can just feed an empty note string using a .constant("")

struct PeopleListView: View {

    var people = peopleArray

    var body: some View {
        NavigationView {
            List(people, id: \.id) { person in
                NavigationLink(
                    destination: PersonDetailView(person: person, note: .constant("")), // Adding in a constant empty string here
                    label: {
                        Label(title: {
                            VStack(alignment: .leading) {
                                Text(person.name)
                                Text(person.job)
                                    .foregroundColor(.secondary)
                                    .font(.caption)
                            }
                        }, icon: {
                            Image(systemName: person.iconName)
                        })
                    })
            }
            .navigationBarTitle("People")
        }

    }
}

Step Three

In the ShortcutsExampleiOS14App.swift file, we'll add an optional @State for the person we want to pass to our detail view and set it to nil. We'll also add an empty @State note string.

@State var personToShow: Person? = nil
@State var note: String = ""

We can use a .sheet modifier attached to the PeopleListView() with the @State var personToShow as the data source. Because we're accessing a new modal sheet, we need to wrap it in a NavigationView so that our navigationBarTitle displays correctly

.sheet(item: $personToShow) { person in
    NavigationView {
        PersonDetailView(person: person, note: $note)
    }
}

Once the personToShow value is no longer nil, the modal will display.

This is what the whole file looks like now:

import SwiftUI
import Intents

@main
struct ShortcutsExampleiOS14App: App {
    @UIApplicationDelegateAdaptor(AppDelegate.self) var appDelegate
    @State var personToShow: Person? = nil // The person we'll pass in to our detail view
    @State var note: String = "" // The note we'll pass into our detail view

    var body: some Scene {
        WindowGroup {
            PeopleListView()
                .sheet(item: $personToShow) { person in
                    NavigationView {
                        PersonDetailView(person: person, note: $note)
                    }
                }
        }
    }

    // This class lets us respond to intents in an iOS14 SwiftUI app
    class AppDelegate: UIResponder, UIApplicationDelegate {
        func application(_ application: UIApplication, handlerFor intent: INIntent) -> Any? {

            switch intent {
                // If the intent being responded to is GetPeople, call the GetPeople intent handler
                case is GetPeopleIntent:
                    return GetPeopleIntentHandler()
                default:
                    return nil
            }
        }
    }

}

If we try to build and run, you'll notice an error because the .sheet modifier expects the item object to conform to Identifiable.

We can go to People.swift and add conformace to our Person struct.

struct Person: Identifiable {
    var id: Int
    var name: String
    var job: String
    var iconName: String
}

We already have an id parameter so we don't need to do anything else to conform to the Identifiable protocol.


Step Four

Our SwiftUI views are now primed to react to a change in state. Let's flesh out our new ViewPerson intent before we explore how to link the two.

Create a new Swift file called ViewPersonIntentHandler.swift.

As before, we'll define our intent handler class conforming to NSObject and ViewPersonIntentHandling:

import Intents

class ViewPersonIntentHandler: NSObject, ViewPersonIntentHandling {

}

Build the project and you'll be prompted to add the neccessary stubs to satisfy the protocol. These are functions to resolve the parameters and handle the intent.

Firstly, we'll resolve the 'note' parameter. We'll simply pass through the user's note string or an empty string if they don't enter anything.

func resolveNote(for intent: ViewPersonIntent, with completion: @escaping (INStringResolutionResult) -> Void) {
    let noteString = intent.note ?? ""
    completion(INStringResolutionResult.success(with: noteString))
}

With the person parameter, we need to pass in a collection of ShortcutsPerson objects for the user to pick from.

We'll map our Person array into an array of ShortcutsPerson and create the expected INObjectCollection.

func providePersonOptionsCollection(for intent: ViewPersonIntent, with completion: @escaping (INObjectCollection<ShortcutsPerson>?, Error?) -> Void) {

    // We'll convert our list of Person in the peopleArray to ShortcutsPeople along with subtitles and images which will be displayed in the shortcuts action's parameter list
    let shortcutsPeople: [ShortcutsPerson] = peopleArray.map { person in
        let shortcutsPerson = ShortcutsPerson(identifier: nil,
                                              display: person.name,
                                              pronunciationHint: nil,
                                              subtitle: person.job,
                                              image: INImage.systemImageNamed(person.iconName))
        return shortcutsPerson
    }

     // Create a collection with the array of ShortcutsPeople.
     let collection = INObjectCollection(items: shortcutsPeople)

     // Call the completion handler, passing the collection.
     completion(collection, nil)
}

We're going to throw an error if the user hasn't selected any person to view in the app. To do this, let's go back to our Intent Definition file and add a validation error to our person parameter.

 
CleanShot 2020-10-23 at 07.29.32@2x.png
 

Back in our intent handler, we'll throw an error if the person parameter is nil, otherwise we'll resolve it.

func resolvePerson(for intent: ViewPersonIntent, with completion: @escaping (ViewPersonPersonResolutionResult) -> Void) {
    // Show an error if the user hasn't selected a person
    guard let person = intent.person else {
        completion(ViewPersonPersonResolutionResult.unsupported(forReason: .noPerson))
        return
    }
    completion(ViewPersonPersonResolutionResult.success(with: person))
}

With both of our parameters validated, let's handle our intent.

We're going to complete with a response code of .continueInApp which, as expected, will launch our app.

func handle(intent: ViewPersonIntent, completion: @escaping (ViewPersonIntentResponse) -> Void) {
    let userActivity = NSUserActivity(activityType: "com.alexhay.example.viewPerson")
    completion(ViewPersonIntentResponse.init(code: .continueInApp, userActivity: userActivity))
}

You can see we're also passing in an NSUserActivity object with a unique ID. Before opening our app, SiriKit will populate its interation property with our intent, as per the documentation.

 
If SiriKit determines that it needs to launch your app, either to handle the intent or respond to errors, it launches your app and delivers your user activity object. (Prior to delivery, SiriKit fills the interaction property of the user activity object with the intent and your response.) In your app, use the information in the provided user activity object to take whatever actions are appropriate.
— SiriKit Documentation
 

Here's our complete intent handler code:

import Intents
import UIKit

class ViewPersonIntentHandler: NSObject, ViewPersonIntentHandling {
    func resolvePerson(for intent: ViewPersonIntent, with completion: @escaping (ViewPersonPersonResolutionResult) -> Void) {
        // Show an error if the user hasn't selected a person
        guard let person = intent.person else {
            completion(ViewPersonPersonResolutionResult.unsupported(forReason: .noPerson))
            return
        }
        completion(ViewPersonPersonResolutionResult.success(with: person))
    }

    func handle(intent: ViewPersonIntent, completion: @escaping (ViewPersonIntentResponse) -> Void) {
        let userActivity = NSUserActivity(activityType: "com.alexhay.example.viewPerson")
        completion(ViewPersonIntentResponse.init(code: .continueInApp, userActivity: userActivity))
    }

    func resolveNote(for intent: ViewPersonIntent, with completion: @escaping (INStringResolutionResult) -> Void) {
        let noteString = intent.note ?? ""
        completion(INStringResolutionResult.success(with: noteString))
    }

    func providePersonOptionsCollection(for intent: ViewPersonIntent, with completion: @escaping (INObjectCollection<ShortcutsPerson>?, Error?) -> Void) {

        // We'll convert our list of Person in the peopleArray to ShortcutsPeople along with subtitles and images which will be displayed in the shortcuts action's parameter list
        let shortcutsPeople: [ShortcutsPerson] = peopleArray.map { person in
            let shortcutsPerson = ShortcutsPerson(identifier: nil,
                                                  display: person.name,
                                                  pronunciationHint: nil,
                                                  subtitle: person.job,
                                                  image: INImage.systemImageNamed(person.iconName))
            return shortcutsPerson
        }

         // Create a collection with the array of ShortcutsPeople.
         let collection = INObjectCollection(items: shortcutsPeople)

         // Call the completion handler, passing the collection.
         completion(collection, nil)
    }


}

Step Five

Before we test our shortcut action, we need to add it as a supported intent in the app target's general tab.

 
CleanShot 2020-10-23 at 08.03.55@2x.png
 

We also need to add a case to AppDelegate class in ShortcutsExampleiOS14App.swift to return the appropriate intent handler.

switch intent {
    // Call the appropriate intent handler
    case is GetPeopleIntent:
        return GetPeopleIntentHandler()
    case is ViewPersonIntent:
        return ViewPersonIntentHandler()

    default:
        return nil
}

Step Six

Build and run our app and add our View Person action to a new shortcut.

If we run it without selecting a person first, an error will be shown as expected.

When we tap on the 'Person' parameter, we now see a list of people to choose from, including a subtitle and thumbnail.

When we run the shortcut having selected a person, our app opens but... the detail page doesn't show.

 
CleanShot 2020-10-23 at 08.12.18.gif
 

Let's add the final piece of the puzzle to trigger the state change in our SwiftUI views.

Still in ShortcutsExampleiOS14App.swift, in the new App protocol in SwiftUI, we can add a .onContinueUserActivity to our PeopleListView().

.onContinueUserActivity("com.alexhay.example.viewPerson") { userActivity in
    if let intent = userActivity.interaction?.intent as? ViewPersonIntent,
       let person = peopleArray.filter({ $0.name == intent.person?.displayString ?? "" }).first {
        note = intent.note ?? ""
        personToShow = person
    }
}

We're using the same unique identifier for the user activity object as we used in the intent handler.

We check to see if the user activity's interaction property has a populated intent property which type casts to our ViewPersonIntent.

If it does, we use the note and person fields to set our states and the detail modal displays.

CleanShot 2020-10-23 at 08.42.49.gif

Summary

Hopefully this tutorial has been helpful in showing how you can use the Visual List API to pick from a rich list of custom objects (including subtitles and images) inside of shortcut action's parameter fields.

I hope it's also provided some ideas of how you can push data and state changes from a shortcut action into a SwiftUI app.

It's a very basic example but once you see how they can connect, you can be pushing data into your UserDefaults, Core Data stack or injecting state changes into your app's environment.

You could even use some of the techniques detailed in this article to deep link into your app's view hierarchy.

You can find this complete project on GitHub.

Any problems, questions or suggestions, let me know on on Twitter!


These are the other posts in the series:

Part 1: Creating a project and adding the first action

Part 2: Exploring parameters: arrays, enums, calculated lists and files

Part 3: In-app intent handling, custom output types, visual list API and using the SwiftUI app protocol

Part 4: Visual Lists in parameters and pushing data from Shortcuts into a SwiftUI view

The complete code for the tutorials is also on GitHub:

Parts 1 & 2 (iOS 13)

Parts 3 & 4 (iOS 14)

Adding Shortcuts To An App: Part Three

In the previous post we looked at adding parameters to a Shortcut action in iOS13 that:

  • accepted multiple values
  • accepted custom file types
  • were enums
  • were conditional with a child/parent relationship
  • provided a calculated list at run time

Since then, iOS14 has been released along with some exciting new features in Shortcuts, which are detailed in the 'What's New In SiriKit & Shortcuts' video from WWDC 2020.

In this tutorial, we'll be exploring 4 new areas:

  • In-App Intent Handling (accessing data directly from our app)
  • The new 'visual list' API
  • How to interact with Shortcuts using the new Swiftui app model in iOS14
  • Outputting custom types

You can find the complete project up to the end of this tutorial on GitHub.


Step One

Firstly, let's create a new project.

We'll use the SwiftUI interface and the new SwiftUI App life cycle, which is new on iOS14 and does away with the familiar SceneDelegate & AppDelegate ways of handling the life cycle of your app.

CleanShot 2020-10-21 at 09.11.43@2x.png

Step Two

Let's create some dummy data. I've added a new file called People which defines a new Person struct and an array of Person populated with 3 entries.

import SwiftUI
import UIKit

struct Person {
    var id: Int
    var name: String
    var job: String
    var iconName: String
}

let peopleArray: [Person] = [
    Person(id: 1, name: "Joe Bloggs", job: "Artist", iconName: "paintpalette"),
    Person(id: 2, name: "Peter Roberts", job: "Taxi Driver", iconName: "car"),
    Person(id: 3, name: "Sarah Love", job: "Author", iconName: "text.book.closed")
]

Step Three

Now create a new SwiftUI file called PeopleViews and we'll create two new SwiftUI views.

import SwiftUI

struct PeopleListView: View {

    var people = peopleArray

    var body: some View {
        NavigationView {
            List(people, id: \.id) { person in
                NavigationLink(
                    destination: PersonDetailView(person: person),
                    label: {
                        Label(title: {
                            VStack(alignment: .leading) {
                                Text(person.name)
                                Text(person.job)
                                    .foregroundColor(.secondary)
                                    .font(.caption)
                            }
                        }, icon: {
                            Image(systemName: person.iconName)
                        })
                    })
            }
            .navigationBarTitle("People")
        }

    }
}

struct PersonDetailView: View {

    var person: Person

    var body: some View {
        VStack {
            Image(systemName: person.iconName)
                .font(Font.system(size: 100))

            Text(person.job)
                .font(.callout)
                .navigationBarTitle(person.name)
                .padding(.top)
        }
        .padding()
        Spacer()
    }
}

struct PeopleViews_Previews: PreviewProvider {
    static var previews: some View {
        PeopleListView()
    }
}

PeopleListView shows a list of our dummy people and PersonDetailView is displayed when we tap on one of the names in the list.


Step Four

Now go to the ShortcutsExampleiOS14App.swift file and change the default ContentView() to PeopleListView() as the new entry point to our app.

Now build and run and you can see our simple dummy views in action.

 
CleanShot 2020-10-21 at 10.36.04@2x.png
CleanShot 2020-10-21 at 10.36.15@2x.png
 

Step Five

Now that we have our simple app set up, let's start adding functionality for Shortcuts. First we'll add a new IntentDefinition file. Let's leave it called Intents.

Now click on the '+' and add a new custom type.

We'll call it PersonShortcuts (since we don't want this type to clash with the existing Person type, which we declared earlier).

Change the display name to "Person" and add two properties, a job string and an image file.

 
CleanShot 2020-10-21 at 12.56.37@2x.png
 

Step Six

Let's create our first Shortcuts action.

Hit '+' again and this time add a new Intent.

This action will pull all the people stored in our app and return them as a custom output type in the Shortcuts app.

For this example we don't need to add any parameters, just give it a title and description, deselect Intent Is Eligibile For Siri Suggestions and add a suitable summary that will be displayed on the shortcuts action.

CleanShot 2020-10-21 at 12.22.29@2x.png

Step Seven

Now lets configure our intent's response - what will be output from the action in the Shortcuts app.

Add a result property with a display name of "People".

Set the type to the ShortcutsPerson type we added earlier (it will just display as "Person" in the drop-down list).

Make sure supports multiple values is checked, since we will be outputting multiple people from the action.

Select this property to be output and leave the success dialog options blank, since we don't want to speak or display the results in the interface, we just want them to be passed to the next shortcuts action.

 
CleanShot 2020-10-21 at 11.16.59@2x.png
 

Now let's add an error string property.

We'll add dialog options since we want to throw up an error message if something goes wrong trying to retrieve the people from our app.

 
CleanShot 2020-10-21 at 11.17.08@2x.png
 

Step Eight

Add a new swift file called GetPeopleIntentHandler and define a new class which conforms to the NSObject and GetPeopleIntentHandling protocols.

Try and build the app and it'll prompt you to add the stub needed to conform to the protocol.

CleanShot 2020-10-21 at 11.28.23@2x.png

Now let's write the code to handle our intent.

We'll:

  • Loop through our person array and create a new ShortcutsPerson for each one
  • Create an image from the person's iconName and add it to the ShortcutsPerson. This is the Visual List API added in iOS14, which will display that image next to each item in Shortcuts lists
  • Handle any errors that may occur
  • Form our response and return the new array of ShortcutsPerson objects
import Intents
import UIKit

class GetPeopleIntentHandler: NSObject, GetPeopleIntentHandling {
    func handle(intent: GetPeopleIntent, completion: @escaping (GetPeopleIntentResponse) -> Void) {
        // Define an empty array of our custom ShortcutsPerson type
        var resultArray = [ShortcutsPerson]()
        // Loop through our people array and create new ShortcutsPerson objects which are added to our result array
        for person in peopleArray {
            // The new 'Visual List' API accepts an optional INImage thumbnail to display next to the display name in Shortcuts lists. Here, we're creating one from the SFSymbol names stored in our people array
            let thumbnail = INImage.systemImageNamed(person.iconName)
            let resultPerson = ShortcutsPerson(identifier: nil, display: person.name, subtitle: person.job, image: thumbnail)
            // Populate our ShortcutsPerson's properties
            resultPerson.job = person.job
            if let imageData = UIImage(systemName: person.iconName)?.jpegData(compressionQuality: 1.0) {
                resultPerson.image = INFile(data: imageData, filename: "\(person.name).jpg", typeIdentifier: "public.jpeg")
            } else {
                // We'll display an error if we can't create a UIImage from the person's iconName
                let errorResponse = GetPeopleIntentResponse.failure(error: "Couldn't create the user image for \(person.name). \"\(person.iconName)\" may not be a valid SFSymbol Name")
                completion(errorResponse)
                return
            }
            resultArray.append(resultPerson)
        }
        // We define a response marked as successful with the success code and add our result array to it
        let response = GetPeopleIntentResponse.init(code: .success, userActivity: nil)
        response.result = resultArray
        completion(response)
    }
}

In-App Intent Handling

Now that we have our intent and intent handler, we need to make sure it's called when our action is run in the Shortcuts app.

Notice that unlike the previous tutorials, we haven't had to add an Intents Extension target to our app.

This is because we'll be using In-App Intent Handling, which was added in iOS14.

When the shortcuts action is run, instead of firing up just the intents extension part of the app (which is highly memory-constrained), we can now access the entirety of our app.

It is launched invisibily in the background, our intent handler fires and the result is output in the Shortcuts app.

One benefit of this is that it's much easier to access data in our app. We don't have to store our CoreData stack or UserDefaults in an app group so that both the app and intents extension targets can both access the same data.

It also means that the memory limitations of handling an intent in an intents extension are negated. We can now perform memory-intensive operations like applying filters to full-size images or performing machine learning tasks on files passed through a Shortcuts action. Previously, this would've caused a crash if the memory usage exceeded something like 30mb.

One caveat to in-app intent handling is that you have exactly 10 seconds to complete out of the intent handler before Shortcuts throws a time-out error.

This 10 seconds also includes the time to fire up the app in the background so it wouldn't be appropriate a lengthy task like encoding video, for example.

You can learn more about this in the Empower Your Intents video from WWDC 2020.


Step Nine

There are two steps to supporting in-app intent handling.

Firstly, we need to add our new intent to the supported intents list in our app's target.

CleanShot 2020-10-21 at 12.10.14@2x.png

Secondly we need to respond to the GetPeople intent being called from the Shortcuts action using our intent handler.

To do this in a pure SwiftUI app, we can define a new class which conforms to the UIApplicationDelegate protocol.

You can read more about this here.

Change the code in ShortcutsExampleiOS14App.swift to look like this:

import SwiftUI
import Intents

@main
struct ShortcutsExampleiOS14App: App {
    @UIApplicationDelegateAdaptor(AppDelegate.self) var appDelegate

    var body: some Scene {
        WindowGroup {
            PeopleListView()
        }
    }

    // This class lets us respond to intents in an iOS14 SwiftUI app
    class AppDelegate: UIResponder, UIApplicationDelegate {
        func application(_ application: UIApplication, handlerFor intent: INIntent) -> Any? {

            switch intent {
                // If the intent being responded to is GetPeople, call the GetPeople intent handler
                case is GetPeopleIntent:
                    return GetPeopleIntentHandler()
                default:
                    return nil
            }
        }
    }

}

Step Ten

In the Shortcuts app, add the Get People action to a new shortcut and run it. You'll see the three ShortcutsPerson objects are returned (as names).

If you add a Choose From List action after the Get People action, you'll see our new visual list being displayed, including thumbnail images and subtitles.

 
CleanShot 2020-10-21 at 14.17.36.gif
 

Change one of the iconNames in our peopleArray to an invalid SFSymbol name:

let peopleArray: [Person] = [
    Person(id: 1, name: "Joe Bloggs", job: "Artist", iconName: "paintpalette"),
    Person(id: 2, name: "Peter Roberts", job: "Taxi Driver", iconName: "notASymbol"),
    Person(id: 3, name: "Sarah Love", job: "Author", iconName: "text.book.closed")
]

Run the shortcut again, we'll see the expected error thrown.

 
CleanShot 2020-10-21 at 16.57.52@2x.png
 

Summary

In this tutorial, we've learned about in-app intent handling, how to output custom types from our Shortcut action and how to add images and subtitles to be displayed in lists. We've also seen how it's posssible to handle intents from the new SwiftUI app protocol on iOS14.

In the next tutorial, we'll be continuing this project to show how we can return data from a parameter in our Shortcuts action, back into our app for display.


These are the other posts in the series:

Part 1: Creating a project and adding the first action

Part 2: Exploring parameters: arrays, enums, calculated lists and files

Part 3: In-app intent handling, custom output types, visual list API and using the SwiftUI app protocol

Part 4: Visual Lists in parameters and pushing data from Shortcuts into a SwiftUI view

The complete code for the tutorials is also on GitHub:

Parts 1 & 2 (iOS 13)

Parts 3 & 4 (iOS 14)

New Release: 2020.6

I’m really happy to announce the biggest update to Toolbox Pro since it launched 8 months ago!

This version features a brand-new design and some incredibly powerful new tools for performing natural language calculations and automating your file system on iOS & iPadOS.

Let’s jump in!


Design

I’ve applied a new lick of paint to the app to keep things looking fresh, including a whole raft of alternative app icons to choose from.

I’ve also optimised the app’s launch time so it should feel snappier when performing automations that require Toolbox Pro to open.


Soulver

This free new tool lets you harness the powerful engine of the excellent Mac app, Soulver, to perform natural language maths, currency and date calculations with ease. It’s like a Siri calculator that works offline.

It can drastically reduce the number of actions in your shortcuts that require complex calculations.

 
Clipboard 20 Jul 2020 at 16.59.PNG
 

Here are a few examples of what Soulver can do:

“£150 is what 25% of what”

= £600

“(1500*15)/10”

= 2,250

“30 hours at $30/hour”

= $900.00

“3:35 am + 7 hours 15 minutes“

= 10:50 am

“17:30 to 20:45“

= 3 hours 15 min

“120 days from now“

= 17 November 2020 at 14:56

“4.54 hours as timespan“

= 4 hours 32 minutes 24 seconds

You can find lots more details about the language it understands here.


Bookmark Files & Folders

In Shortcuts, there’s no way to access files outside of the Shortcuts iCloud folder without manually selecting them using the ‘Get Files‘ action.

Having to manually select files or folders makes it harder to create useful automations such as batch saving photos to your desktop or deleting any large files in your downloads folder that are older than 30 days.

The new File & Folder Bookmarks tools in Toolbox Pro let you access and manipulate files outside of the Shortcuts sandbox in lots of useful ways.

You can also search for files and folders, generate preview images to use in menus, copy, move, tag or trash files.

I’ve put together two quick tutorials that give a quick glimpse at what these tools can do:


Set Nested Dictionary Values

Shortcuts has a really useful ‘dot notation’ syntax for accessing values deep in nested dictionaries.

For example you can use the Get Dictionary Value action and type ‘people.alex.job’ to get the value of ‘Chef’ in the nested dictionary in the first image below:

IMG_8228.jpg

To write a new value however, you’d have to access the nested dictionary, set the new value and then write the nested dictionary back in to the container dictionary, as shown in the second image.

This can be a cumbersome process and takes some mental gymnastics for anything other than a very simple dictionary.

The new Set Nested Dictionary tool in this release lets you use the same dot notation syntax to write values deep into complex dictionaries. Meaning the three actions in the second image above, become the single action in the final image.


What’s Next?

I’m excited to get this release out. I think these tools will make it easier to build even more powerful shortcuts.

I’m also already hard at work getting Toolbox Pro ready for iOS14. There are some big changes to Shortcuts that will make many of Toolbox Pro’s actions far more powerful.

For example many actions will now not need to open Toolbox Pro to run (Get Text From Images, Filter Images etc).

Generating menus will no longer use a workaround that generated fake contacts and uses a new Visual List API.

You can see a sneak peak of features as I work on them on Twitter.

Alex Hay
Adding Shortcuts To An App: Part Two

In the last post we looked at starting from scratch with a blank Xcode project and adding a basic Shortcuts action that made text uppercase.

In this post we’re going to dive deeper and look at different types of parameters including handling arrays, enums, nested parameters and calculated options.

We’re going to be creating a new Shortcuts action that will accept multiple files of any type and rename them with a formatted date (either prepended or appended). We’ll also optionally offer to change the case and then output the files back into Shortcuts.

This project will be updated on GitHub with each post.

Let’s get started!


Step One

Navigate to the Intents.intentdefinition file, hit the + and let’s add a new intent called RenameFiles.

Xcode 2020-04-09 at 00.20.03@2x.png

Step Two

Add a description for the intent and add our first parameter. We’ll call it files.

Set the type to File and since we want to be able to rename multiple files at once, tick Supports multiple values.

Under file type, we could leave it on Text or Image if we only wanted to support those types of files but we want to accept any files so we’ll select Custom.

Now we can define the UTIs (uniform type identifiers) of files we want to accept in our Files parameter.

UTIs are strings that Apple use to identify file types. If we wanted to allow only PDFs, we could add com.adobe.pdf or if we want to broadly support movie files we could use public.movie.

CleanShot 2020-04-09 at 00.28.08@2x.png

We want to support all file types so we’ll use the base type that encompasses all other UTIs: public.item.

Now let’s add a prompt and a validation error and untick Intent is eligible for Siri Suggestions as per the previous post.

Xcode 2020-04-09 at 00.23.03@2x.png

Step Three

Next we’ll add a new parameter called dateFormat. This will be a pre-populated list of calculated values so we’ll tick Valid values are provided dynamically and add a validation error code.

Xcode 2020-04-09 at 00.40.45@2x.png

Step Four

We’re going to give the user the option to change the case of the title when renaming. Let’s add a new Boolean parameter called changeCase. Add a prompt and check the default value is false.

Xcode 2020-04-09 at 00.45.25@2x.png

Step Five

If the user elects to change the case then we want to give them the option of either uppercase or lowercase.

To do that, we’re going to add a new parameter called newCase that will be only be shown when our changeCase paratmeter is set to true.

Under type select Add new enum…. We’ll call our enum RenameCase and set the display name to Case. This will show in the title of the window when the user is choosing which case. Add lowercase and uppercase as our options.

Xcode 2020-04-09 at 00.47.54@2x.png

Step Six

Head back to our Intent and notice the type is now Case. We can now set a default value to uppercase.

To make sure our new parameter only shows when changeCase is true, we’ll select parent parameter, has exact value and true.

Xcode 2020-04-09 at 09.11.24@2x.png

It’s worth noting you can only have one level of nesting parent/child parameters. We couldn’t now have a new parameter that only shows if the “newCase” is “uppercase”, for example.


Step Seven

We’ll add a final parameter which allows the user to choose where the date is positioned in the new filename. We’ll call the parameter position and set the type to a new RenamePosition enum, containing prepend and append.

We’ll capitalise the display names since these are going to be the first words in our action’s summary.

Set the default value to Prepend.

Xcode 2020-04-09 at 09.15.07@2x.png

Step Eight

Set the input and key parameters to files since the previous action is likely to be providing the files to rename to this one, so it makes sense to automatically populate the parameter.

In the intent, notice our summary has two supported combinations. This is because we have a parent parameter. We can now choose different summaries depending on whether changeCase toggled on.

We’ll use the same description for both summaries. We’ll leave the changeCase and case parameters out of the summary since they’re optional. They’ll show in the Shortcut action under a show more twirl-down.

2020-04-09 12.20.25.gif
ezgif-1-0ca7d3e0e19b.gif

Step Nine

Now we’ll add a response. For our result make sure the type is File since that’s what we’re outputting.

We’ll set the display name to Renamed Files, tick Supports multiple values since we’ll be outputting more than one and select result in the output. Add an error property in case we need to show any errors to the user.

CleanShot 2020-04-09 at 01.13.14@2x.png

Step Ten

Now let’s write our intent handler. Create a new Swift file called renameFilesHandler.swift. I’ve put it in a group folder called Intents to keep them together.

Define our new RenameFilesIntentHandler class that inherits from NSObject and conforms to the automatically created RenameFilesIntentHandling protocol. Xcode can auto-populate our protocol stubs - we have a function to validate each parameter, one to provide options for our provideDate drop-down list and one to handle the intent.

Step Eleven

When validating a parameter that accepts multiple values, we need to return an array of resolution results.

In this code we’re creating an empty array of RenameFilesFilesResolutionResult.

If our Files parameter is empty then we return a single unsupported resolution result in our array which will show the error we defined.

If there are input files, we append a successful resolution result to the array for each one.

Note that files in Intents are described by objects called INFiles.

func resolveFiles(for intent: RenameFilesIntent, with completion: @escaping ([RenameFilesFilesResolutionResult]) -> Void) {
    var resultArray = [RenameFilesFilesResolutionResult]()
    let files = intent.files ?? []
    if files.isEmpty {
        resultArray.append(RenameFilesFilesResolutionResult.unsupported(forReason: .noFiles))
    } else {
        for file in files {
            resultArray.append(RenameFilesFilesResolutionResult.success(with: file))
        }
    }
    completion(resultArray)
}

Step Twelve

We’ll provide options for our dateFormat parameter by creating an array of strings with today’s date in three different formats (eg: 2020-04-01, 2020-04 & 2020).

We’ll then validate that the user has picked one of the options or we’ll show an error.

func provideDateFormatOptions(for intent: RenameFilesIntent, with completion: @escaping ([String]?, Error?) -> Void) {
    let dateFormatter = DateFormatter()
    dateFormatter.locale = Locale.current
    dateFormatter.calendar = Calendar.current
    dateFormatter.dateFormat = “yyyy-MM-dd”

    let fullDate = dateFormatter.string(from: Date())
    let yearsAndMonths = String(fullDate.dropLast(3))
    let yearOnly = String(fullDate.dropLast(6))

    let optionsArray: [String] = [fullDate, yearsAndMonths, yearOnly]

    completion(optionsArray, nil)
 }

func resolveDateFormat(for intent: RenameFilesIntent, with completion: @escaping (RenameFilesDateFormatResolutionResult) -> Void) {
    if let dateFormat = intent.dateFormat {
        completion(RenameFilesDateFormatResolutionResult.success(with: dateFormat))
    } else {
        completion(RenameFilesDateFormatResolutionResult.unsupported(forReason: .empty))
    }
}

Step Thirteen

It’s easy to resolve our non-Optional enum values.

func resolveNewCase(for intent: RenameFilesIntent, with completion: @escaping (RenameCaseResolutionResult) -> Void) {
    let newCase = intent.newCase
    completion(RenameCaseResolutionResult.success(with: newCase))
}

func resolvePosition(for intent: RenameFilesIntent, with completion: @escaping (RenamePositionResolutionResult) -> Void) {
    let position = intent.position
    completion(RenamePositionResolutionResult.success(with: position))
}

Step Fourteen

With our changeCase Bool parameter, we’ll default to false if the input is ambiguous.

func resolveChangeCase(for intent: RenameFilesIntent, with completion: @escaping (INBooleanResolutionResult) -> Void) {
    let changeCase = intent.changeCase?.boolValue ?? false
    completion(INBooleanResolutionResult.success(with: changeCase))
}

Step Fifteen

Now we’ll write the code to handle the main logic intent: renaming the files and outputting the results.

We’ll use all of our validated parameters to return an array of identical INFiles with new names, or we’ll display an error if there’s a problem.

func handle(intent: RenameFilesIntent, completion: @escaping (RenameFilesIntentResponse) -> Void) {
    let files = intent.files ?? []
    let position = intent.position
    let changeCase = intent.changeCase?.boolValue ?? false
    guard let dateFormat = intent.dateFormat else {
        completion(RenameFilesIntentResponse.failure(error: “Please choose a valid date format”))
        return
    }

    var outputArray = [INFile]()

    for file in files {
        var newName = file.filename

        if changeCase {
            let newCase = intent.newCase
            switch newCase {
            case .lowercase:
                newName = newName.lowercased()
            case .uppercase:
                newName = newName.uppercased()
            default:
                completion(RenameFilesIntentResponse.failure(error: “An invalid case was selected”))
                return
            }
        }

        switch position {
        case .append:
            guard let fileURL = file.fileURL else {
                completion(RenameFilesIntentResponse.failure(error: “Couldn’t get file URL of \(file.filename)”))
                return
            }
            let filePath = fileURL.deletingPathExtension().lastPathComponent
            let nameNoExt = FileManager.default.displayName(atPath: filePath)
            let ext = fileURL.pathExtension
            newName = “\(nameNoExt)_\(dateFormat).\(ext)”
        case .prepend:
            newName = “\(dateFormat)_\(newName)”
        default:
            completion(RenameFilesIntentResponse.failure(error: “An invalid position was selected”))
            return
        }

        let renamedFile = INFile(data: file.data, filename: newName, typeIdentifier: file.typeIdentifier)
        outputArray.append(renamedFile)
    }
    completion(RenameFilesIntentResponse.success(result: outputArray))
}

Here’s the complete, commented intent handler:

import Intents

class RenameFilesIntentHandler: NSObject, RenameFilesIntentHandling {

    func resolveFiles(for intent: RenameFilesIntent, with completion: @escaping ([RenameFilesFilesResolutionResult]) -> Void) {
        // For paramters that accept multiple files, we need to pass an array of Resolution Results to the completion handler
        var resultArray = [RenameFilesFilesResolutionResult]()
        let files = intent.files ?? []
        if files.isEmpty {
            resultArray.append(RenameFilesFilesResolutionResult.unsupported(forReason: .noFiles))
        } else {
            for file in files {
                resultArray.append(RenameFilesFilesResolutionResult.success(with: file))
            }
        }
        completion(resultArray)
    }

    // this function will provide the drop-down list of options to choose from when tapping the “Date Format parameter in Shortcuts”
    func provideDateFormatOptions(for intent: RenameFilesIntent, with completion: @escaping ([String]?, Error?) -> Void) {
        let dateFormatter = DateFormatter()
        dateFormatter.locale = Locale.current
        dateFormatter.calendar = Calendar.current
        dateFormatter.dateFormat = “yyyy-MM-dd”

        let fullDate = dateFormatter.string(from: Date())
        let yearsAndMonths = String(fullDate.dropLast(3))
        let yearOnly = String(fullDate.dropLast(6))

        let optionsArray: [String] = [fullDate, yearsAndMonths, yearOnly]

        completion(optionsArray, nil)
     }

    func resolveDateFormat(for intent: RenameFilesIntent, with completion: @escaping (RenameFilesDateFormatResolutionResult) -> Void) {
        if let dateFormat = intent.dateFormat {
            completion(RenameFilesDateFormatResolutionResult.success(with: dateFormat))
        } else {
            completion(RenameFilesDateFormatResolutionResult.unsupported(forReason: .empty))
        }
    }

    func resolveNewCase(for intent: RenameFilesIntent, with completion: @escaping (RenameCaseResolutionResult) -> Void) {
        let newCase = intent.newCase
        completion(RenameCaseResolutionResult.success(with: newCase))
    }

    func resolvePosition(for intent: RenameFilesIntent, with completion: @escaping (RenamePositionResolutionResult) -> Void) {
        let position = intent.position
        completion(RenamePositionResolutionResult.success(with: position))
    }

    func resolveChangeCase(for intent: RenameFilesIntent, with completion: @escaping (INBooleanResolutionResult) -> Void) {
        let changeCase = intent.changeCase?.boolValue ?? false
        completion(INBooleanResolutionResult.success(with: changeCase))
    }

    func handle(intent: RenameFilesIntent, completion: @escaping (RenameFilesIntentResponse) -> Void) {
        let files = intent.files ?? []
        let position = intent.position
        let changeCase = intent.changeCase?.boolValue ?? false
        guard let dateFormat = intent.dateFormat else {
            // We can display errors to the user when problems occur
            completion(RenameFilesIntentResponse.failure(error: “Please choose a valid date format”))
            return
        }

        // The intent response expects an array of INFiles
        var outputArray = [INFile]()

        for file in files {
            var newName = file.filename

            // change the case of the filename if selected
            if changeCase {
                let newCase = intent.newCase
                switch newCase {
                case .lowercase:
                    newName = newName.lowercased()
                case .uppercase:
                    newName = newName.uppercased()
                default:
                    completion(RenameFilesIntentResponse.failure(error: “An invalid case was selected”))
                    return
                }
            }

            // append or prepend the selected date value
            switch position {
            case .append:
                // if appending the date, we need to split the extension from the name first
                guard let fileURL = file.fileURL else {
                    completion(RenameFilesIntentResponse.failure(error: “Couldn’t get file URL of \(file.filename)”))
                    return
                }
                let filePath = fileURL.deletingPathExtension().lastPathComponent
                let nameNoExt = FileManager.default.displayName(atPath: filePath)
                let ext = fileURL.pathExtension
                newName = “\(nameNoExt)_\(dateFormat).\(ext)”
            case .prepend:
                newName = “\(dateFormat)_\(newName)”
            default:
                // We’ll show an error if for some reason one of our enum values hasn’t been selected
                completion(RenameFilesIntentResponse.failure(error: “An invalid position was selected”))
                return
            }

            // construct a new INFile with identical data and type identifier and the new file name
            let renamedFile = INFile(data: file.data, filename: newName, typeIdentifier: file.typeIdentifier)
            outputArray.append(renamedFile)
        }
        completion(RenameFilesIntentResponse.success(result: outputArray))
    }
}

Step Sixteen

Now let’s make sure our IntentHandler is called when the shortcut is run.

In IntentHandler.swift we’ll add a new case for RenameFilesIntent to our switch statement:

import Intents

class IntentHandler: INExtension {

    // When shortcuts are run, the relevant intent handler should to be returned
    override func handler(for intent: INIntent) -> Any {
        switch intent {
        case is MakeUppercaseIntent:
            return MakeUppercaseIntentHandler()
        case is RenameFilesIntent:
            return RenameFilesIntentHandler()
        default:
            // No intents should be unhandled so we’ll throw an error by default
            fatalError(“No handler for this intent”)
        }
    }
}

Step Seventeen

Let’s build and run, jump into the Shortcuts app and try our new action out!

Mockups 3.png

Summary

In this post we’ve looked at parameters that:

  • accept multiple values
  • accept custom file types
  • are enums
  • are conditional with a child/parent relationship
  • provide a calculated list at run time

In the next post we’ll be looking at in-app intent handling, the visual list API, outputting custom types and supporting iOS 14's new SwiftUI App protocol.


These are the other posts in the series:

Part 1: Creating a project and adding the first action

Part 2: Exploring parameters: arrays, enums, calculated lists and files

Part 3: In-app intent handling, custom output types, visual list API and using the SwiftUI app protocol

Part 4: Visual Lists in parameters and pushing data from Shortcuts into a SwiftUI view

The complete code for the tutorials is also on GitHub:

Parts 1 & 2 (iOS 13)

Parts 3 & 4 (iOS 14)

Adding Shortcuts To An App: Part One

When I decided I wanted to make a Shortcuts utility app, I downloaded Apple’s Shortcuts demo project ‘Soup Chef’ to try and figure it all out.

It's a really excellent demo project, full of all the functionality that can be used to make complex shortcut actions, but since I was just starting out, I found it overwhelming how much was in there.

There weren’t a great deal of articles to help learn the basics from scratch - especially in a SwiftUI project - so I thought I would write my own to help anyone else looking to do the same.

My intention with this series of posts is to take you from a new project right through to adding complex shortcuts, step by step. I'd suggest reading this tutorial and then moving on to the Soup Chef project to learn more about using frameworks, storing data between your intent extension and your main app and how to localise your shortcut actions.

The completed project we’re building is available in full on GitHub and I’ll be updating it as I release each post.


Step One

In this first tutorial, we’ll be creating a basic project and adding our first shortcut which, when run, will simply make any input text uppercase.

Let's create a new project in Xcode. Select ‘single view app’, give it a name and set the user interface to SwiftUI.

Xcode 2020-04-04 at 13.26.26@2x.png

Step Two

Shortcuts are a part of SiriKit and it's an ‘intent extension’ which handles most interactions with SiriKit. It's like a separate shard of your app that runs in the background.

Go to File > New Target, add an Intents Extension. Give it a name, I’m calling it Shortcuts.

Xcode 2020-04-04 at 13.27.24@2x.png

Step Three

Right click on our new ‘Shortcuts’ target folder, and add a new file. Select the SiriKit Intent Definition File. Leave it called ‘Intents’

Xcode 2020-04-04 at 13.29.08@2x.png

Step Four

Click on the new definition file and click the ‘+’, to add a new Intent, which will eventually be a single action in Shortcuts.

Here we can define what the shortcut action will look like and what parameters it accepts. We’ll call this ‘MakeUppercase’. As per Apple’s guidelines:

Name your intent using a VerbNoun convention, like SetAlarm, CheckOrderStatus, and so on

Make sure it’s added to the Shortcuts and main app targets in the inspector:

 
CleanShot 2020-04-04 at 17.01.44@2x.png
 

Step Five

Add a short description about what the shortcut does. Then let's add a parameter, this will be the source string we want to make uppercase. We’ll call it ‘text’. This will only support a single value so we’ll leave ‘Supports multiple values’ unticked. We don’t want a default value, so we’ll leave that blank.


Step Six

We’re required to add a Siri prompt for the parameter. This is used if the shortcut is triggered without a UI for example through Siri or on a Homepod. Let's just enter: “Which text would you like to make uppercase?


Step Seven

We’re going to show an error to the user in the Shortcuts app if the source text is empty. This is optional. Our validation error code will be ‘noText’ and our template is “Please enter some text to make uppercase”.

Xcode 2020-04-04 at 13.52.57@2x.png

Step Eight

Now in the ‘Suggestions’ section we’ll untick ‘Intent is eligible for Siri Suggestions’. This allows the system to show the action on the lock screen or in the search from the dashboard but we don’t need that for this example.


Step Nine

Now we’ll configure how our shortcut action will look inside of Shortcuts. Let’s select our text parameter for both ‘Input Parameter’ and ‘Key Parameter’. Before writing how the action is displayed, it’s worth checking Apple’s User Interface Guidelines for phrasing guidance:

Start titles with a verb and use sentence-style capitalization without punctuation. Think of a shortcut title as a brief instruction

We’ll use “Make text uppercase”. Start typing the name of your parameter to select the variable.

Any variables not entered in the Summary box will show inside the Shortcuts action’s ‘Show More’ twirl-down. These are usually optional parameters.

Xcode 2020-04-04 at 13.56.14@2x.png

Step Ten

Now let’s configure what is output from the Shortcuts action. Click on the custom intent’s Response. We’ll add two properties, “result” and “error”. Both are strings and won’t support multiple values. We’ll change the display name of the ‘result’ to “Uppercase Text”.


Step Eleven

We’ll change the output to our new “result” property - this is what will be output from the shortcut action. In our Response Templates, we’ll add the ‘result’ property to both the voice and printed success dialogs and we’ll add the ‘error’ property in the same way to the failure code

Xcode 2020-04-04 at 14.15.19@2x.png

Step Twelve

Now let’s write some code! Let’s head to our Shortcuts target folder and create a new Swift file called “makeUppercaseHandler”. We’ll a define a new subclass which inherits from NSObject and conforms to the MakeUppercaseIntentHandling protocol (which is automatically generated when we added our “makeUppercase“ intent):

import Intents

class MakeUppercaseIntentHandler: NSObject, MakeUppercaseIntentHandling {

}

You’ll see it throws an error because we’re not handling the ‘text’ parameter we added or handing the intent. Let’s hit the fix button to add the required protocol stubs.

Xcode 2020-04-04 at 16.29.12@2x.png

Step Thirteen

You’ll see we have two functions we need to add code for: resolving the text parameter and then handling the intent. Let’s resolve our text parameter first.

func resolveText(for intent: MakeUppercaseIntent, with completion: @escaping (MakeUppercaseTextResolutionResult) -> Void) {
    if let text = intent.text, !text.isEmpty {
        completion(MakeUppercaseTextResolutionResult.success(with: text))
    } else {
        completion(MakeUppercaseTextResolutionResult.unsupported(forReason: .noText))
    }
}

Here we’re checking make sure the text parameter isn’t nil or an empty string. If it does have a value, we’re sending it through to the handler. If there’s no value then we’re going to throw the error code we defined earlier.


Step Fourteen

Now let’s handle the intent:

func handle(intent: MakeUppercaseIntent, completion: @escaping (MakeUppercaseIntentResponse) -> Void) {
    if let inputText = intent.text {
        let uppercaseText = inputText.uppercased()
        completion(MakeUppercaseIntentResponse.success(result: uppercaseText))
    } else {
        completion(MakeUppercaseIntentResponse.failure(error: “The entered text was invalid”))
    }
}

We’re defining our text variable - we know the optional value is safe because we’ve validated it in the previous step but for the sake of showing how to throw an error that will display in Shortcuts, we’re passing a Intent Response failure with the template we set earlier.

If the text is valid we’re making it uppercase and then using the response code to output the result. These are the other response codes included automatically (which we’ll look at in later posts):

unspecified, ready, continueInApp, inProgress, success, failure, and failureRequiringAppLaunch

Bear 2020-04-04 at 17.50.24@2x.png

Step Fifteen

OK so far so good. Our project builds and if we run it on our device, in the Shortcuts app we can see a new action called ‘Make Uppercase’. When we run it however, we’ll get “An unknown error occurred”. That’s because the intent handler we just wrote isn’t being called when the shortcut is run.

 
Mockups.png
 

Step Sixteen

Let’s go to the IntentHandler file in our shortcuts target. We’ll delete the existing return ‘self value’ and add a switch statement that will return the intent handler we just wrote if the intent is MakeUppercase.

import Intents

class IntentHandler: INExtension {

    override func handler(for intent: INIntent) -> Any {
        switch intent {
        case is MakeUppercaseIntent:
            return MakeUppercaseIntentHandler()
        default:
            fatalError(“No handler for this intent”)
        }
    }
}

Now if we add more shortcuts actions we can write intent handlers for each one and call them from this switch statement. The intent should never be unhandled so we’ll throw a fatal error by default.


Step Seventeen

Let’s build our app and go back to the Shortcuts app and try again.

Success! Our text is made uppercase and when there’s no value we see the error message.

 
Mockups 2.png
 

Summary

We’ve successfully created a shortcut action that works as expected in the Shortcuts app.

We’ve learnt how to validate a single parameter and how to output results and errors.

Now that we have a foundation in place, in the next posts we’ll look at more complex shortcuts - handling arrays, files and pre-populated parameter lists, custom output objects and returning data to our main SwiftUI app.


These are the other posts in the series:

Part 1: Creating a project and adding the first action

Part 2: Exploring parameters: arrays, enums, calculated lists and files

Part 3: In-app intent handling, custom output types, visual list API and using the SwiftUI app protocol

Part 4: Visual Lists in parameters and pushing data from Shortcuts into a SwiftUI view

The complete code for the tutorials is also on GitHub:

Parts 1 & 2 (iOS 13)

Parts 3 & 4 (iOS 14)

My WWDC 2019 Shortcuts Wishlist
 
Image.PNG
 

With WWDC just around the corner, will we see Shortcuts take the stage again? Will there be a version 3 shipping in the new iOS beta? I hope so!

Either way, here's my utterly exhaustive list of features and improvements I'd love to see in the next version - ranging from the feasible to a-snowball’s-chance-in-Hell.

Third-party Integrations

Image.gif

Complex integrations with third-party apps are currently restricted to a limited range of domains. These include apps for messaging and creating lists or notes. This is why you’ll see the complex actions for apps such as Bear, Day One, Drafts, Whatsapp and Things but any other apps can only donate basic actions to Shortcuts and can accept no parameters.

Some apps like the JSON viewer Jayson (free) use the clipboard as a variable workaround, whilst others can receive data through URL schemes. I’m hoping that this WWDC, we will see a greater number of categories opened up to rich Shortcut actions. Think apps like Spotify, Netflix & Overcast. Spark, Google Maps (or Search), Monzo, Amazon or Reddit.

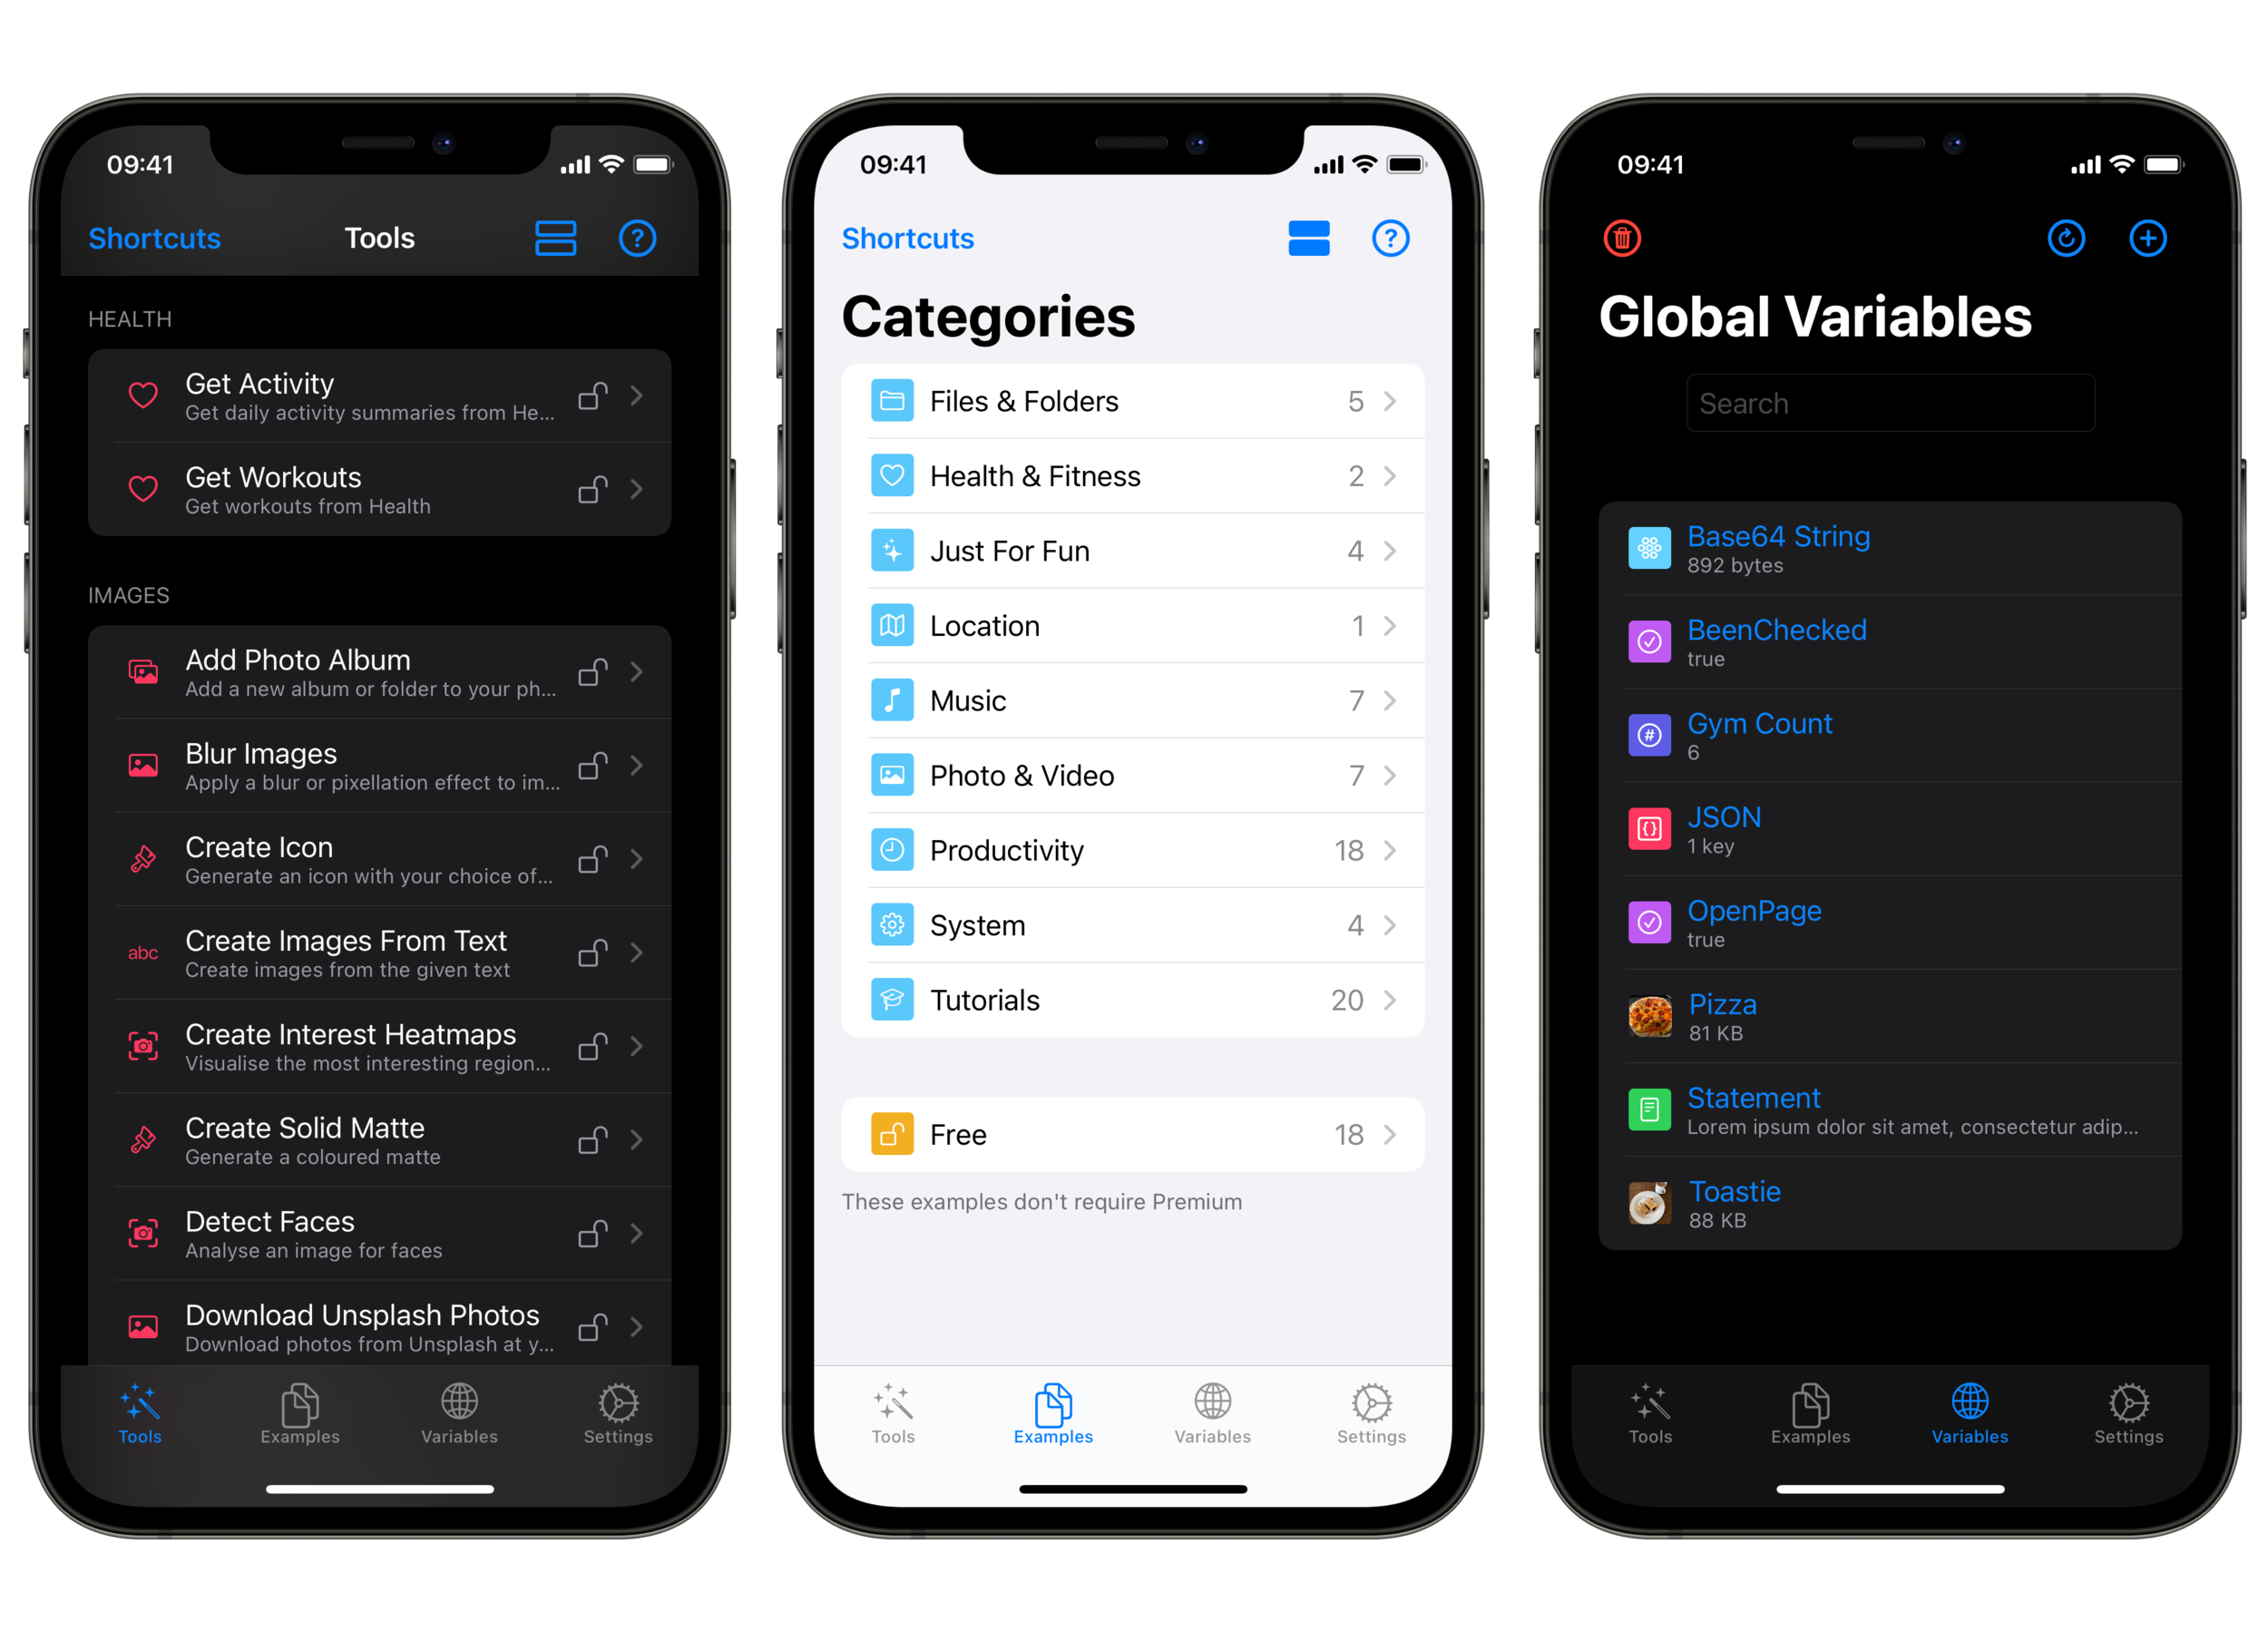
Shortcut Organisation

Everyone has 400 shortcuts in their library, right? Well, even if you don't, I think we all could use a little more organisation.

How should we bring order to the chaos? Folders? Tags? Either one is better than an endless library.

One thing I've been wondering is if you could store shortcuts in a folder, would you then be able to share the folder containing the shortcuts? Could you run the folder as if it were a single shortcut?

It could be incredibly powerful if we could combine several shortcuts acting as functions together into a single bundle so that the user doesn't have to download multiple files.

Automatically Triggering Shortcuts

Along with folders, this is the almost certainly the most requested feature on r/shortcuts. I have my doubts Apple will ever want shortcuts to be able to automatically run without the user intentionally triggering them, but think of the power! Imagine shortcuts that could be set to trigger at a specific location or when an alarm goes off, a file is detected in a watched folder or a message is received from a specific contact.

It would take Shortcuts to a whole new level of automation.

Edit View Navigation

People are really pushing the limits of what shortcuts can do far beyond what I imagine they were originally intended for. As such, working with long, complex shortcuts is incredibly fiddly and frustrating, with a LOT of scrolling involved.

I'd like to see a search function brought into the edit view. Imagine pulling down from the top of the UI (like the library search) and searching for 'comment' and then being able to tap a 'next' button to cycle through each comment action block. It'd be like having chapter headings you could jump between. I'd also like to be able to search for strings or variables within the action blocks.

A couple of other additions that could improve usability would be:

  • The ability to 'fold' repeat and if blocks. Complex shortcuts that are hundreds of blocks long could then be folded down to a few, easily scrollable actions instead.

  • Comments embedded into the action blocks themselves. These would be in addition to the current comment block and they could take the form of a note icon in the action’s title bar. They wouldn't take up precious vertical space and would show their contents when tapped by the user.

Copy & Paste

There’s a borderline miraculous copy/paste shortcut that lets you copy or move actions within or between your shortcuts. It is a bit of a hassle though and a first-party solution would be a real time saver.

Unleash The Power Of The Content Graph

The content graph is the magic at the core of Shortcuts. Add a 'view content graph' action anywhere in your shortcut and marvel at all the data displayed. Unfortunately, not all of this data is accessible by the user. It would open up a lot of possibilities if we could access the full firehose.

System Actions

Now that Workflow has been fully absorbed by the Apple mothership, I'm hoping that they've spent the last year using their new-found keys to the castle to implement lots of new system actions they never would've had access to as a third-party app.

A few ideas of system features I'd like to see introduced:

  • Mail - the ability to search and act upon emails

  • Camera - actions beyond the basic 'take a photo'. For example, launch into portrait mode, a specific filter or slo mo video frame rate

  • Photos - find photos using the system’s powerful ML search along with face data. Also, the ability to programmatically access the editing tools as well as copy/paste edits

  • Settings - basically everything in here. Especially more granular wifi/bluetooth controls. I presume the new dark mode will be toggle-able through Shortcuts...

  • Activity - I'm desperate to be able to access workouts data and activity rings info from my Apple Watch

  • Other apps like 'Find My…', Clips, Numbers, Pages etc would all really benefit from at least basic Shortcuts support. I should be able to grab the location of my friend and write it to a Numbers spreadsheet, surely!

Siri

I rarely run shortcuts from Siri but I probably would if we could input variables along with our trigger phrase. We should also be able to enter text as a question to Siri and receive the response as input into the next action.

Running Shortcuts From Home Screen

Saving a shortcut to your home screen is great in theory, but it feels incredibly clunky when you're kicked back into the Shortcuts app to run it in the edit view.

It would feel much cleaner to be able to run the shortcut as if it were a real app.

System UI

Films masquerading as contacts

Films masquerading as contacts

Shortcuts could be so much more powerful if we could present data in a table view with images, sub titles etc rather than having to hack a contacts.vcf file together.

Another thing Shortcuts can't do easily is allow the user to rearrange items presented in a list - this could be achieved using the native iOS rearrange UI.

‘Get Apps’ Action

You can use "Get shortcuts" to check whether a user has a specific shortcut installed (UpdateKit for example). I'd like to see this functionality expanded to "Get apps" in addition to the existing "Open in App..." action.

Apple Watch App

The workflow watch app was nixed - will we see a new Shortcuts watch app at WWDC?

Triggering a shortcut from a complication would be dreamy.

Smart Notifications

Imagine if Shortcuts could access the smart notifications UI and present buttons that would fire off different actions.

This would require multiple shortcuts to be able to run simultaneously but with rumours of the new iPad software allowing for apps to run multiple windows, could this be a possibility?

Sort By Number

The (poorly named) "filter files" action allows you to sort an array by alphabet. It should really be able to sort by numeric value as well since the current sort-by-number workarounds are pretty painful.

Directory Information

I'd like to be able to select a directory in Shortcuts and grab all the files inside it.

I'd also like to be able to get the path to a selected file. This would let you save a converted file back to the same location as the original, for example.

Writing To Nested Dictionaries

The improvements to reading from nested dictionaries using the value1.value2 syntax made working with complex dictionaries much easier. I'd like to see that same syntax applied to the "Set Dictionary Value" action so that changing the values of nested dictionaries would be just as easy.

Significant Locations

Did you know your iPhone stores your frequently visited locations?

You can see them in:

Settings > Privacy > Location Services > System Services (at the bottom) > Significant Locations

If you turn on airplane mode and create a new voice memo, you'll see that despite having no connection, its title is a location near where you are. It seems to me it's accessing the phone's recent significant locations.

This is useful data being recorded - let me access it too!

Screen Time

The same goes for Screen Time. It's an excellent feature that is trapped behind a wall. I want to free that data and work with it. Without an api, I'd also like to be able to trigger Down Time and App Limits with shortcuts.

Video Actions

The ability to manipulate video is pretty limited right now. I can't access a video's individual frames unless I convert the whole thing to a GIF first. One awesome way of opening up video tools would be to allow access to frameworks like FFmpeg.

Shortcuts On The Mac

I’d love for there to be a Mac version of the app. Could it be introduced as part of the introduction of the new ‘Marizpan’ frameworks that will allow iOS apps to run on the mac? There are whispers that it could be but do they refer to the Shortcuts app itself or Siri Shortcuts actions?

The dream would be integration with AppleScript but that brings its own complexities. Realistically I don’t think we’ll see a Mac Shortcuts app this year, but I suspect there’s a plan for it to one day become the Automator replacement.

Bug Fixes

Magic variables are fantastic but the UI falls apart somewhat in lengthy shortcuts, becoming laggy and jumping all over the place. There are also memory problems running shortcuts from the widget that can be frustrating.


I hope my enormous list doesn’t come across as ungrateful because I love Shortcuts.

The power it gives us to compute away on our tiny computers is incredibly empowering and I'm frequently floored by the creative ways people leverage that power in their day to day lives.

The Shortcuts team have done an incredible job distilling a staggering amount of complexity into an incredibly intuitive, user-friendly interface.

That said, please give us folders…

What would you like to see?

Unicode Date And Time Cheatsheet
 
Image.PNG
 

If you’ve ever wanted to use a custom date format in Shortcuts, you will have seen that you need to use the patterns documented in the (rather intimidating) Unicode Technical Standards #35 .

I’ve laid out a simpler cheat-sheet version of common patterns you may want to use below. You can also download this PDF version for offline viewing.


DATES

Symbol Example Notes
Week Days E Tue
EEEE Tuesday
EEEEE T
EEEEEE Tu
Day Of Week e 2 Start of week according to local calendar
c 2 Monday as start of week
Day Of Month d 1
Day Of Year D 342
Week Of Year w 27
Day Of Week In Month F 2 2nd Wed in July
Week Of Month W 3
Month M 09
MMM Sept
MMMM September
MMMMM S
Year y 2019
yy 19
Quarter Q 02
QQQ Q2
QQQQ 2nd Quarter

TIMES

Symbol Example Notes
Period a AM AM or PM
Hours h 9 12-hour clock
hh 09
H 21 24-hour clock
HH 21
Minutes m 6
mm 06
Seconds s 8
ss 08
Fractional Seconds S 3 Example is rounded fraction after the decimal point (3.247 seconds)
SS 35
SSS 347
Time Zones z BST Specific non-location format
zzzz British Summer Time
Z +0100 Localised format
ZZZZ GMT+01:00
ZZZZZ +01:00
O GMT+1
OOOO GMT+01:00
v PDT Generic non-location format
vvvv Pacific Daylight Time
V gblon Timezone ID (short)
VV Europe/London Timezone ID (long)
VVV London Exemplar City
VVVV United Kingdom Time Generic location format